Help Docs
Credit & Usage
Raspberry AI
Brands

Blueprints in Raspberry AI

Save the prompts you use most, and reuse them anywhere in Boards.

A Blueprint is a saved piece of prompt direction. Build it once, then pull it into any prompt box with a slash instead of typing it out again. Blueprints can be kept to yourself, shared with your organization, or pulled from Raspberry’s curated set.

Blueprints are available in Boards, anywhere there is a prompt box — including Sketch to Render, On Body, Off Body, and Edit.
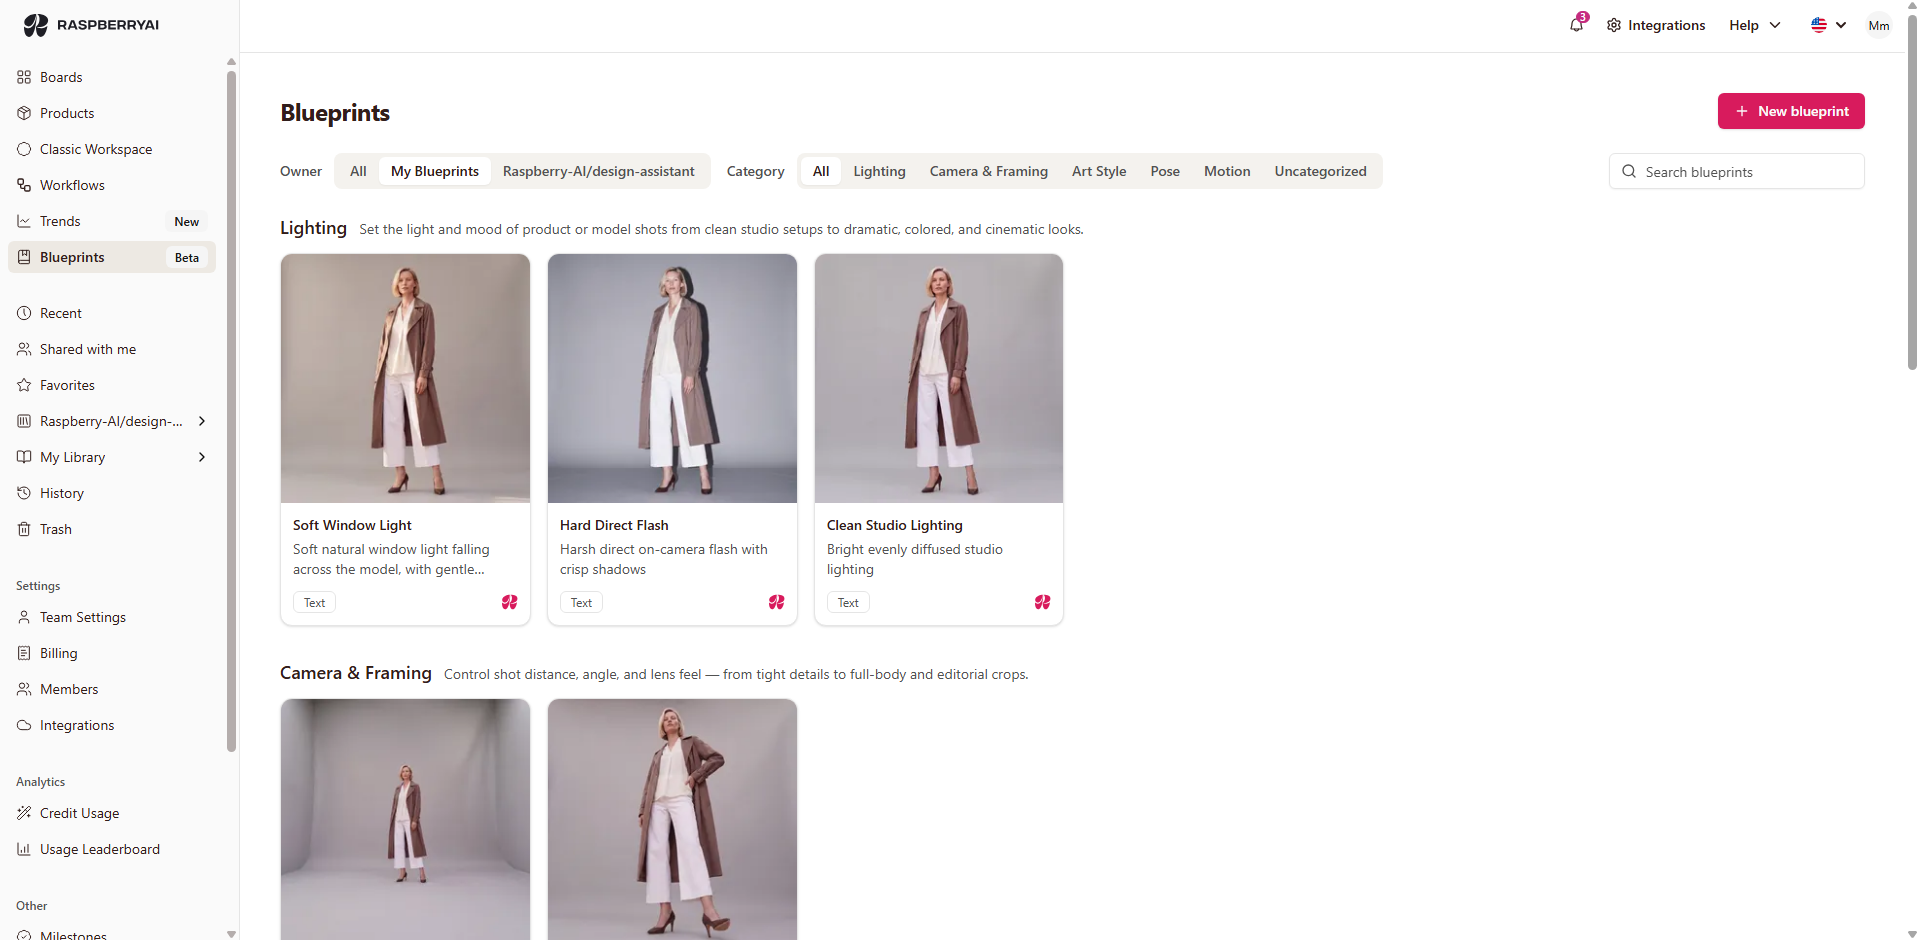
Your Blueprint library, organized by category.
1

What belongs in a Blueprint

Blueprints save the creative direction of a generation — lighting, pose, camera angle, composition, motion, and art style. They do not cover the product itself. Fabrics, models, colors, and trims stay where they already live in your workflow.

A good test: if you would apply it to many different styles, it belongs in a Blueprint. If it only describes one specific product, it does not.

Good Blueprint
Not a Blueprint
Lighting
Soft natural window light with gentle shadows
Make this jacket ivory
Pose
Model stands in a relaxed contrapposto pose
Use the model from last season’s campaign
Framing
Full-body framing with intentional negative space
Crop to the front pocket of this style
Art style
Rendered as a contemporary fashion illustration
Apply this specific plaid print
2

Where your Blueprints live

The library has three tabs:

Mine — Blueprints you created. Only you can see these unless you share them.
My team’s — Blueprints anyone in your organization has shared. Everyone can use these.
Raspberry’s — a curated starter set from Raspberry, available to every organization. These are read-only, but you can duplicate one to make it your own.

You can also filter by category — lighting, camera and framing, pose, motion, and art style — to narrow the list.

3

Create a Blueprint

1
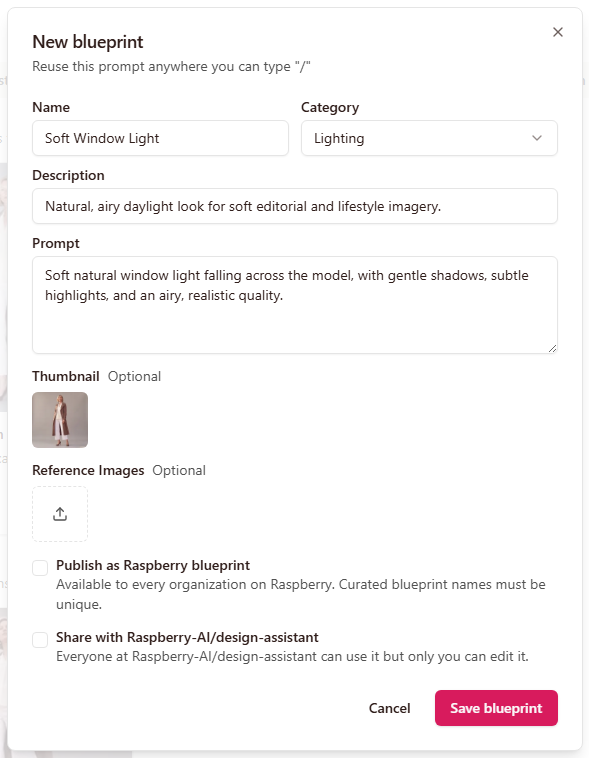
Open the Blueprints tab and click + New  Blueprint.
2
Give it a name. Keep it short and descriptive since this is what you’ll search for later. “Soft Window Light” is easier to find than “Lighting 2.”
3
Choose a category.
4
Write a description. This is what your team sees when they’re deciding whether to use it, so describe when to use it — for example, “Natural, airy daylight look for soft editorial and lifestyle imagery.”
5
Add your prompt text. This is the direction that gets applied to the generation.
6
Add a thumbnail. Use an image that looks like the result the Blueprint produces, so it’s easy to spot in the picker.
7
Add reference images, if you have them. See Reference images below.
8
Click Create.
Everything a Blueprint needs, in one dialog.
Tip: Write your Blueprint prompt the way you’d write any prompt — describe the look, not the garment.
4

Save a prompt you’ve already written

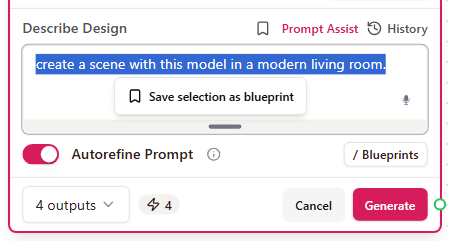
If you write a prompt in a Board that works well, you don’t have to rebuild it in the library. Save it as a Blueprint directly from the prompt area, then add a name and description in the dialog that opens.
5

Insert a Blueprint into a prompt

1
Click into any prompt box in Boards.
2
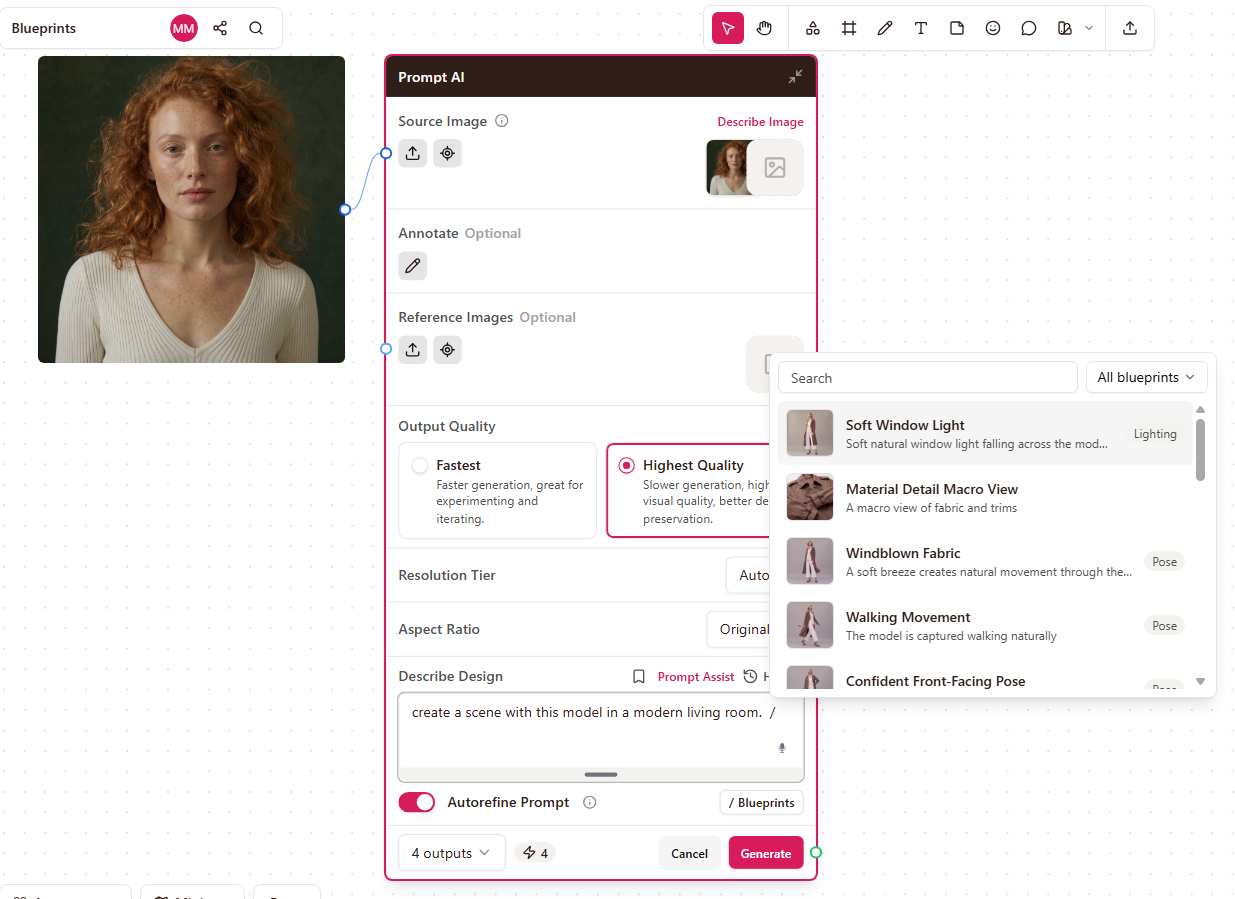
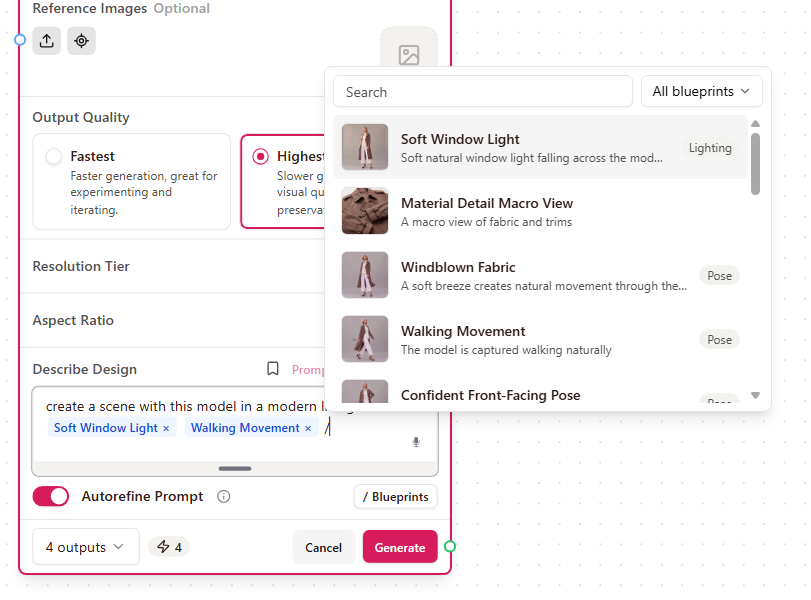
Type a forward slash (/) to open the Blueprint picker. You can also click the Blueprint button next to the prompt box to browse.
3
Search by name, or scroll to browse.
4
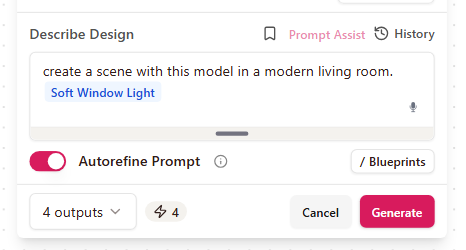
Select the Blueprint. It attaches to your prompt as a chip.
5
Write your own prompt as usual.
6
Click Generate.
Your prompt plus the Blueprint, both visible before you generate.
Note: The slash only opens the picker at the start of a word, so text like “50/50 blend” or “black/white” won’t trigger it.
6

Using more than one Blueprint

You can attach several Blueprints to the same prompt — one for lighting, one for pose, one for framing.

They combine in the order you see on screen. Your own prompt runs first, then each Blueprint in the order the chips appear. If the order matters, drag the chips to rearrange them.

Hover a chip to preview what’s in it, or remove it if you don’t want it on this generation.
Tip: Keep each Blueprint focused on one thing. Separate lighting, pose, and framing Blueprints can be mixed and matched. One Blueprint that does all three can only be used as-is.
7

Reference images

A Blueprint can include reference images along with its prompt text. These ride along as extra context and do not take up your node’s existing image slots — your garment, model, and print slots keep working exactly as they do today.

Support for Blueprint reference images is rolling out across generation surfaces, starting with pose presets in On Body. You can attach them now, and they’ll be used as each surface picks them up.

8

Editing, sharing, and duplicating

Editing. You can edit any Blueprint you created. Inserting a Blueprint links to it rather than copying it, so when you make an edit, future generations use the updated version. Generations you’ve already run are not affected.

Sharing. Share a Blueprint with your organization when it represents a standard — an approved lighting setup, a brand photography style, a house pose. Everyone can use it, but only you can edit it.

Duplicating. To change someone else’s Blueprint, or one of Raspberry’s, duplicate it first. You get your own editable copy and the original stays as it is.

Deleting. If you delete a Blueprint that’s attached to a node, the chip shows a broken state and that node won’t generate until you remove or replace it.

9

See which Blueprints made an output

Every generation saves a record of exactly what each attached Blueprint contained at the time it ran. If a Blueprint is edited later, you can still look back and see what produced an earlier output — and why a new generation might look different.

10

Building a library your team will actually use

Start with the looks you reach for most. Three or four is plenty — your studio lighting setup, your campaign framing, your go-to pose.
Keep them modular. One Blueprint per idea, so they can be combined.
Write descriptions for the person who didn’t build it. Say when to use it, not just what it does.
Share your standards. If a look is brand-approved, share it so nobody has to rewrite it from memory.
Turn your best prompts into Blueprints. If someone on your team consistently gets great results, save their setup so everyone can use it.
11

Troubleshooting

Typing a slash doesn’t open the picker. The slash has to be at the start of a word. Add a space before it and try again.
I can’t edit a Blueprint. You can only edit Blueprints you created. Duplicate it to get an editable copy.
My chip shows a broken state and I can’t generate. The Blueprint it points to was deleted. Remove the chip or swap in another Blueprint.
My output changed even though I used the same Blueprint. The Blueprint may have been edited since your last generation. Check the record on the earlier output to compare.
My reference images don’t seem to be doing anything. Blueprint reference images are being enabled surface by surface. They’re saved on the Blueprint and will apply once that surface supports them.
The results aren’t what I expected with several Blueprints attached. Check the chip order, and check whether two Blueprints are giving conflicting direction — two different lighting setups, for example. Remove one and generate again.