


Tech Pack in Raspberry
How to generate, review, edit, and export a complete tech pack from a garment image.
What is a tech pack?
A tech pack is the standard spec sheet manufacturers use to produce a garment: technical flat sketches, points of measure (POM), bill of materials (BOM), colorways, construction details, and artwork or trim callouts. It is the source-of-truth document handed from design to the factory.
What Raspberry generates
Upload images of a garment and Raspberry produces a complete editable tech pack, including:
Technical flat sketches (front, back, and side)
Editable annotations
Points of measure (POM), in centimeters or inches
Bill of materials (BOM)
Colorways — either yours or auto-generated
Artwork and detail callouts
Flats, annotations, POM, and BOM can all be edited or regenerated, and the finished pack exports to PDF or individual JPGs.
Creating a tech pack, step by step
1. Set up the Tech Pack node
Add a Tech Pack node to your canvas and connect or upload your garment images. Then set the options for this pack:
Reference Images up to 5 views. Front, back, and side are the most useful; add detail shots for trims or artwork.
Colorways choose Detect from garment to pull colors from your images, or Pick from palette to specify your own and add each color to the palette.
Units Centimeters, Millimeters or Inches. This sets the units used throughout the points of measure.
Reference Tech Pack (optional) attach one of your existing packs to match your team’s format, fields, and measurement conventions.
Additional Context (optional) describe anything specific to include in the prompt.
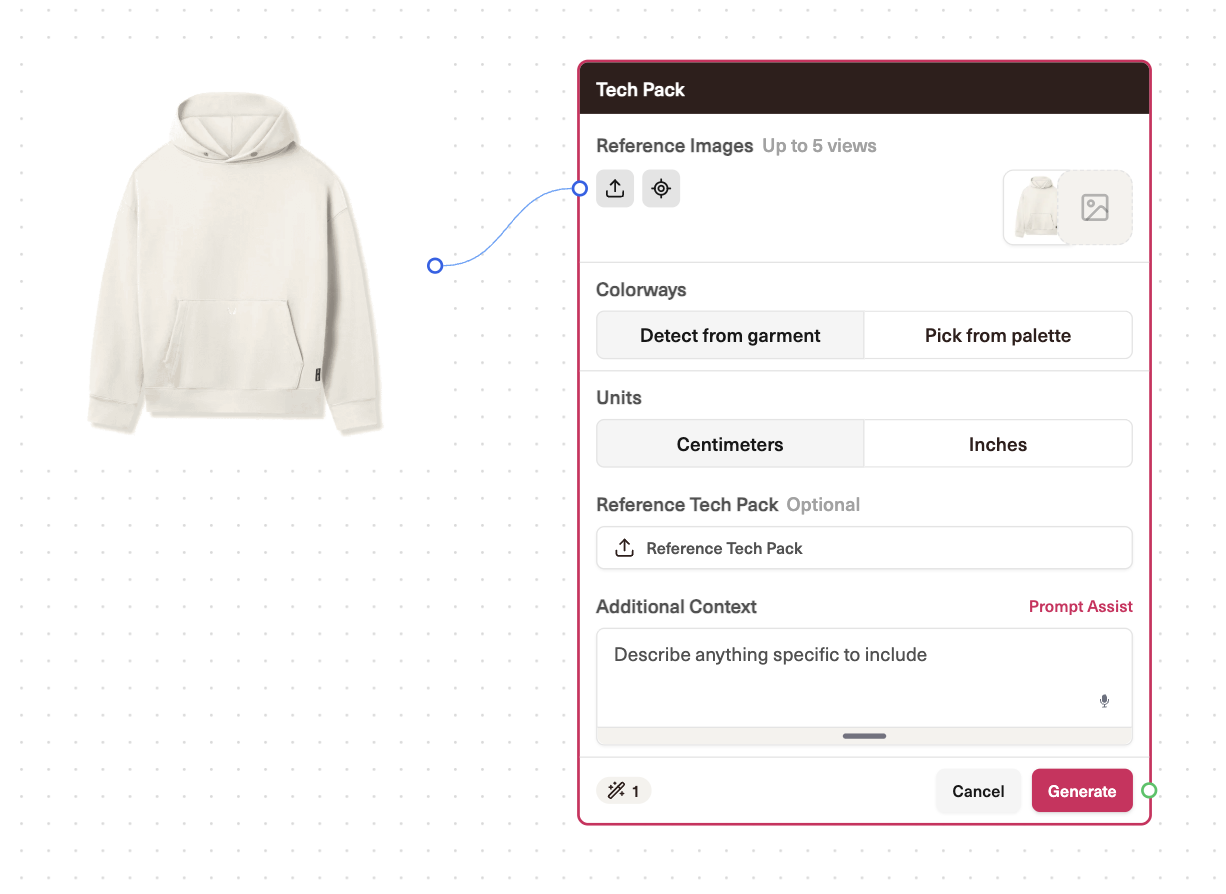
The Tech Pack node, ready to configure.
2. Generate
Select Generate. Generation takes about five minutes, and the node shows its status until the result is marked Ready. Materials are added to your library as they are created. Select Edit tech pack on the result to open it, or Regenerate to run it again with different settings.
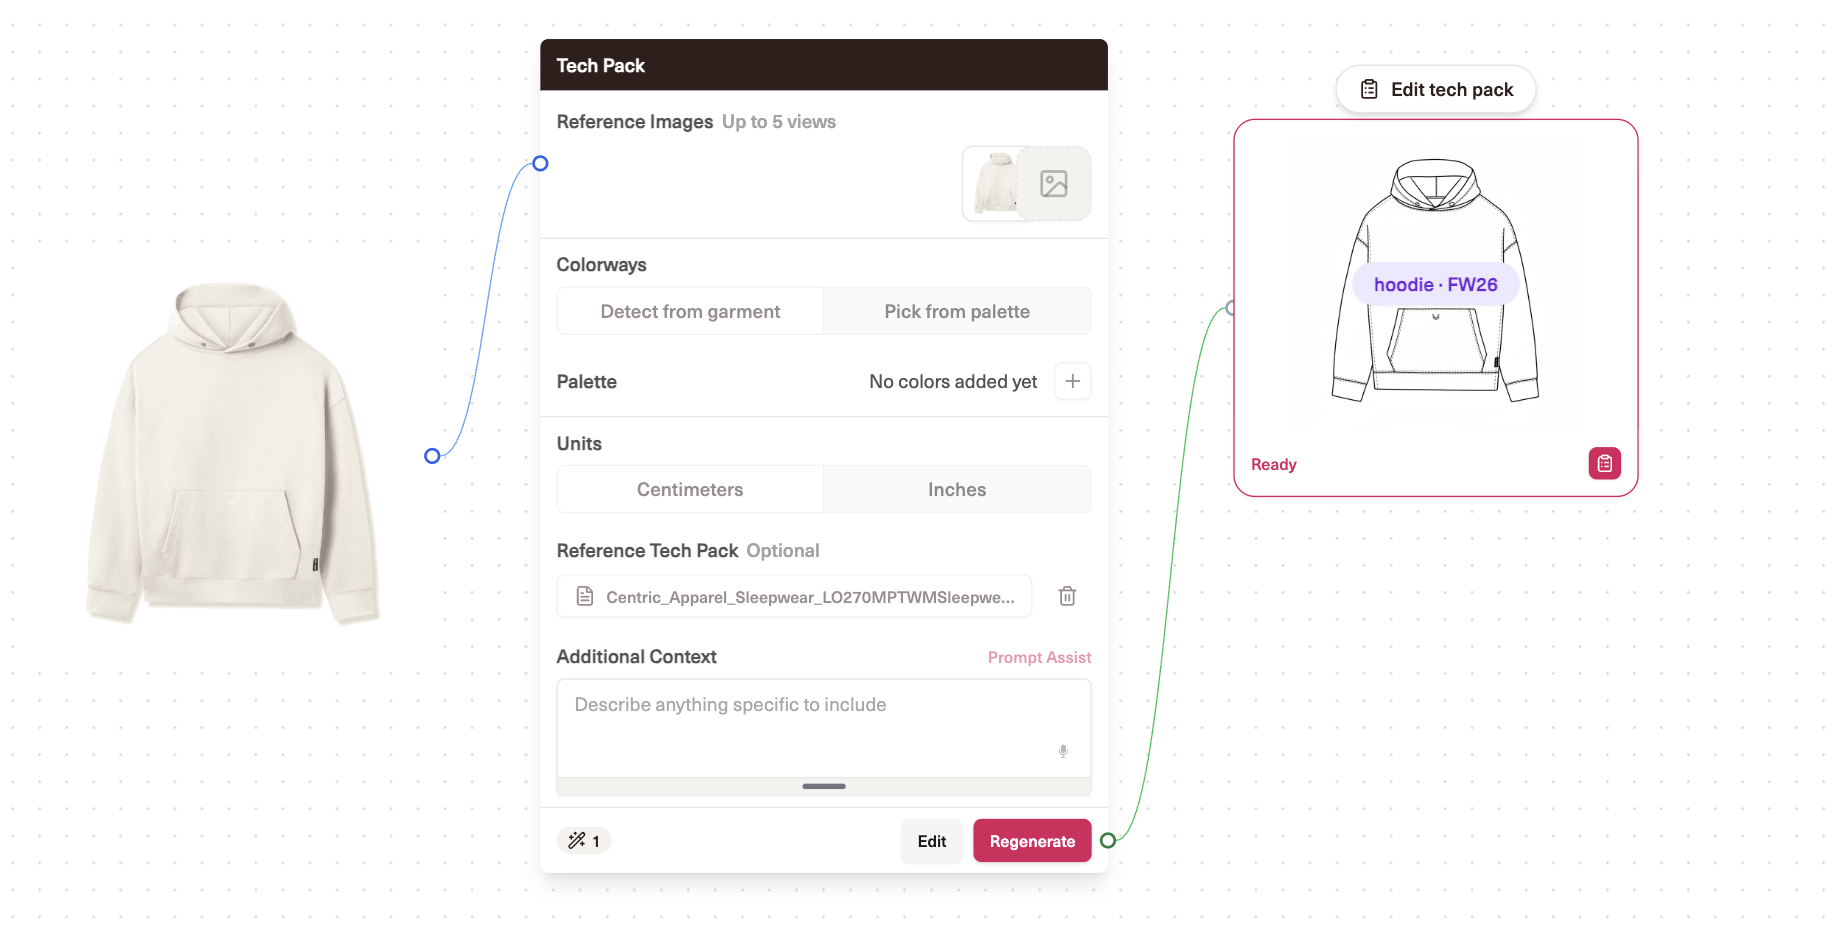
A completed generation, marked Ready, with a reference tech pack attached.
3. Review each section
The tech pack opens in a sectioned editor: Technical Flats, Colorways, Annotations, Points of Measure, Bill of Materials, and Artwork.
Page Metadata on the Technical Flats section — Style Name, Style #, Season, Sample Status, Fabrication — appears in the exported Tech Pack. Drag the fields to reorder them, or add your own with Add field.
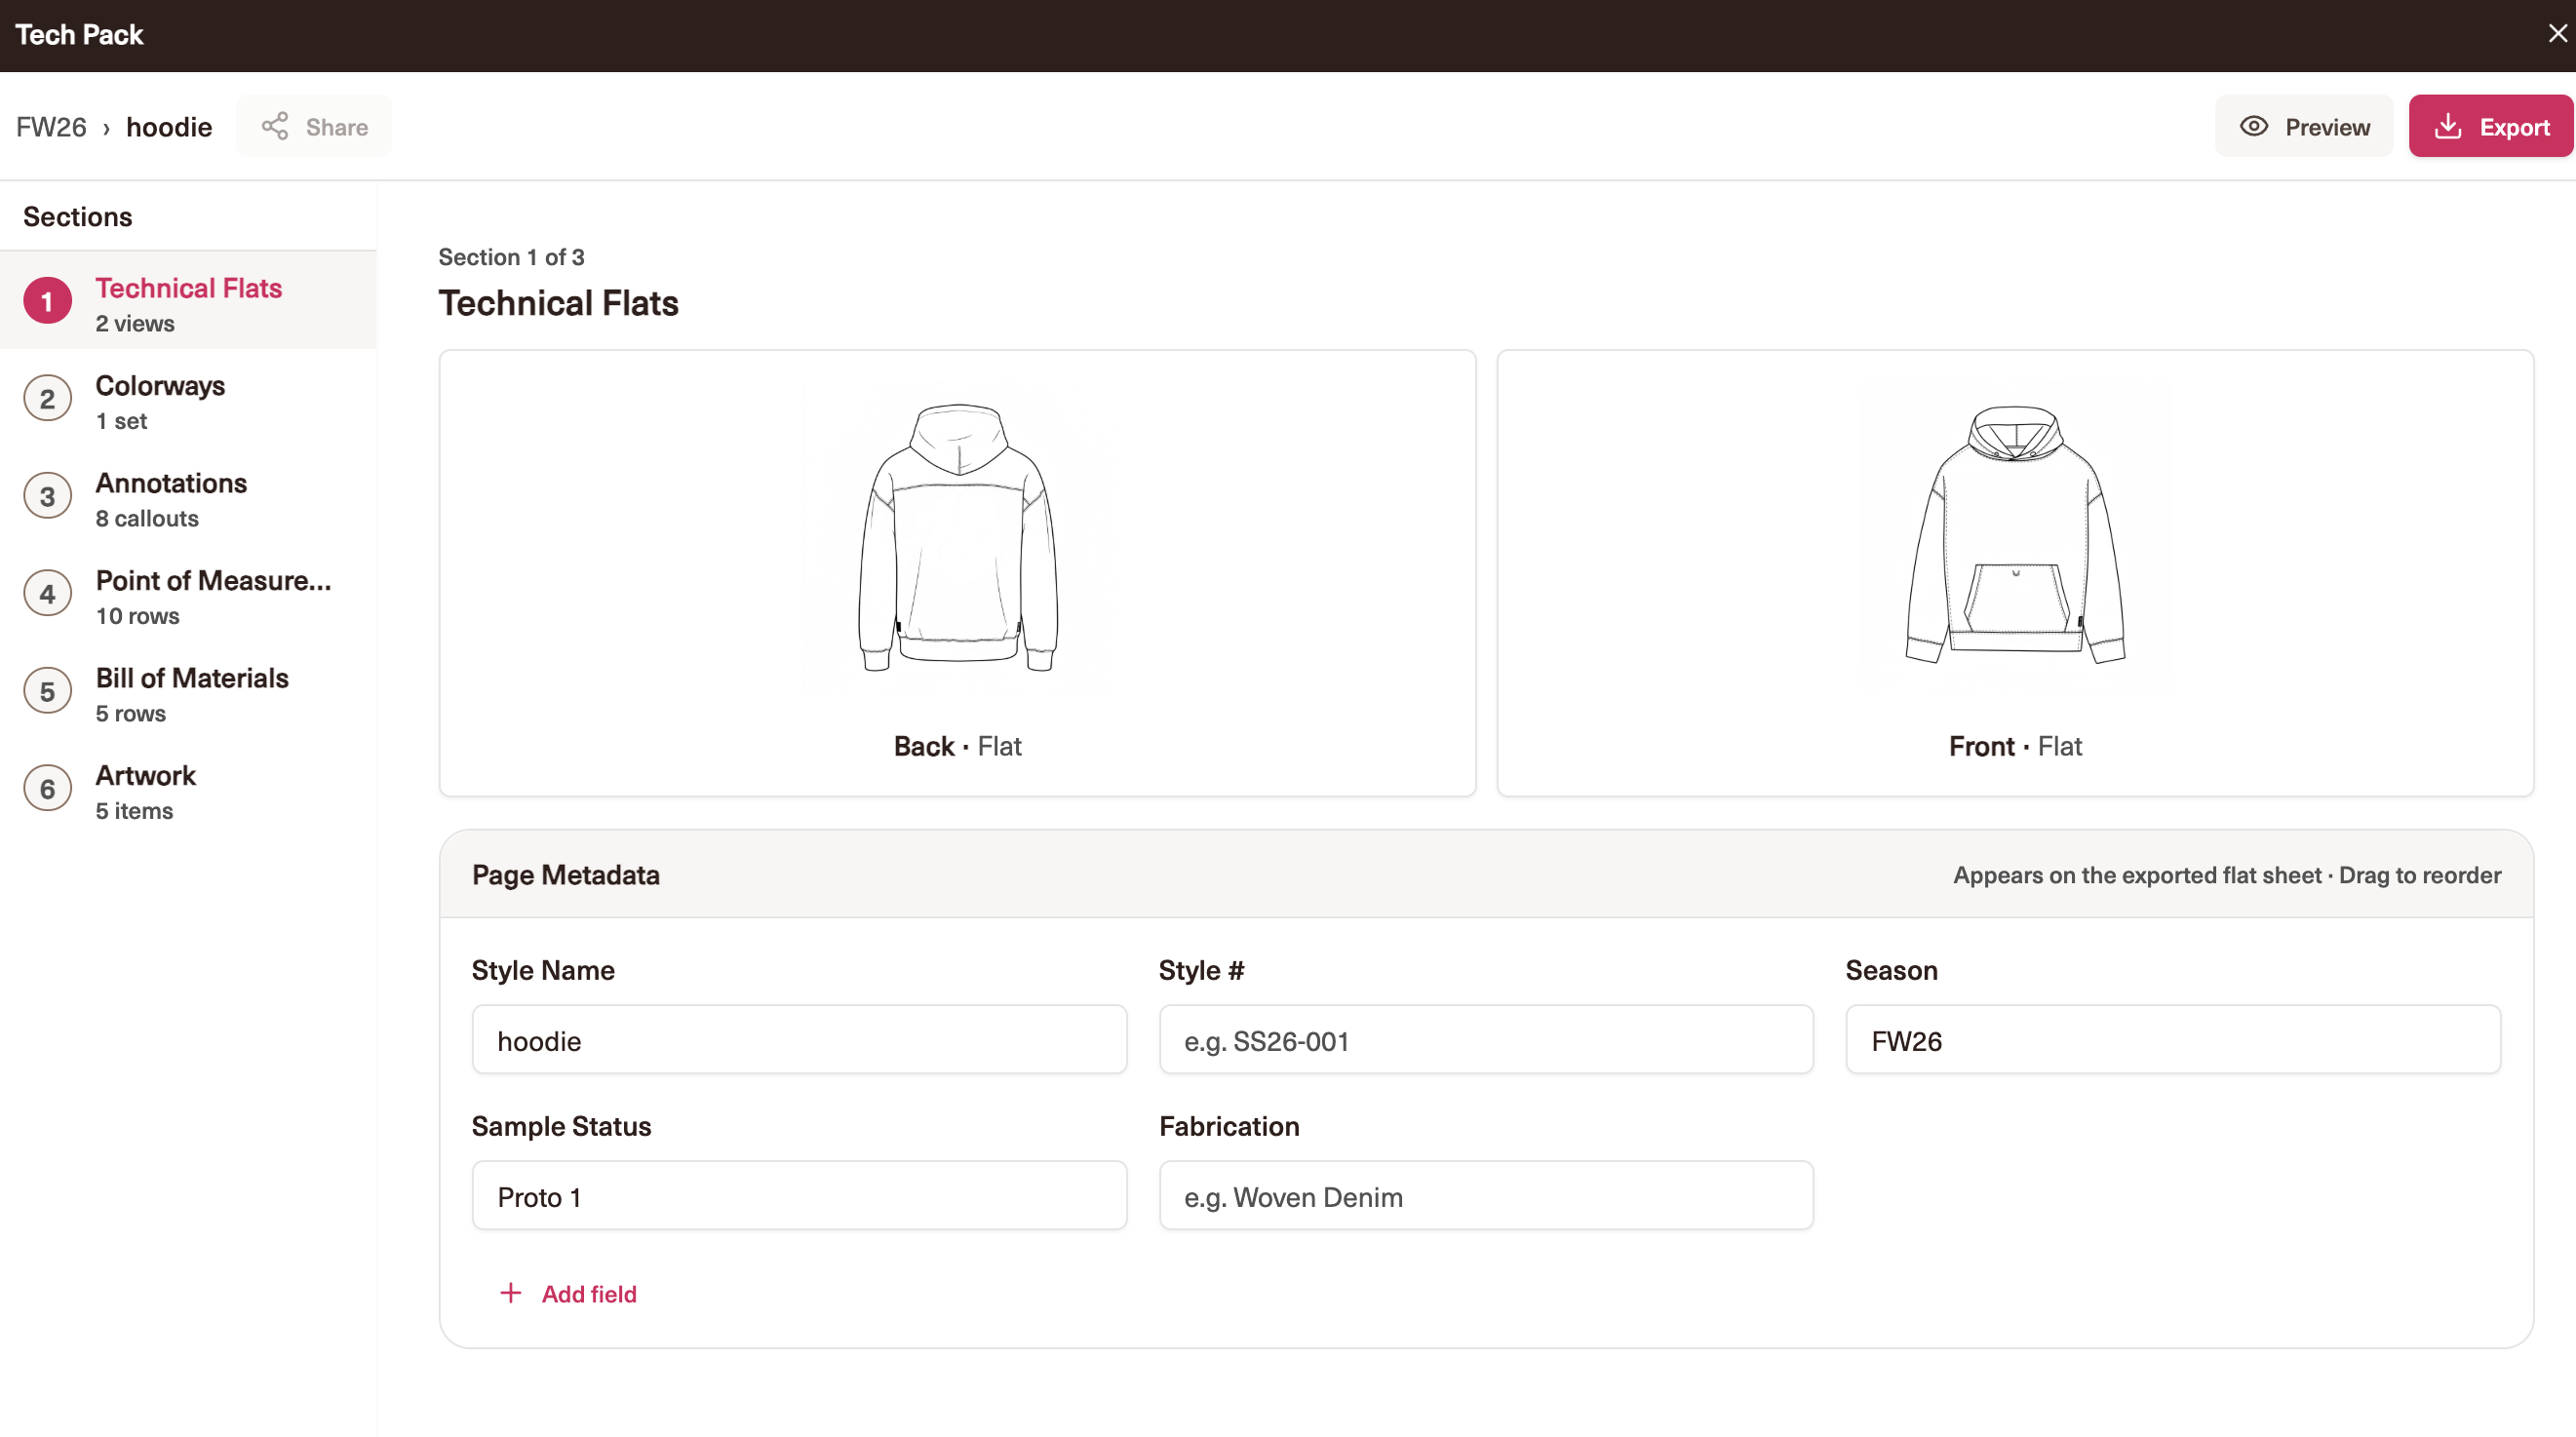
The Technical Flats section, with page metadata below.
4. Pull materials into the BOM
The Bill of Materials is a components table covering fabric, trim, labels, graphics, and packaging.
Use the Material Library panel to add fabrics, trims, and labels you have already saved. Note that materials are copied into the tech pack, and later changes to a library item will not alter a tech pack that already uses it.
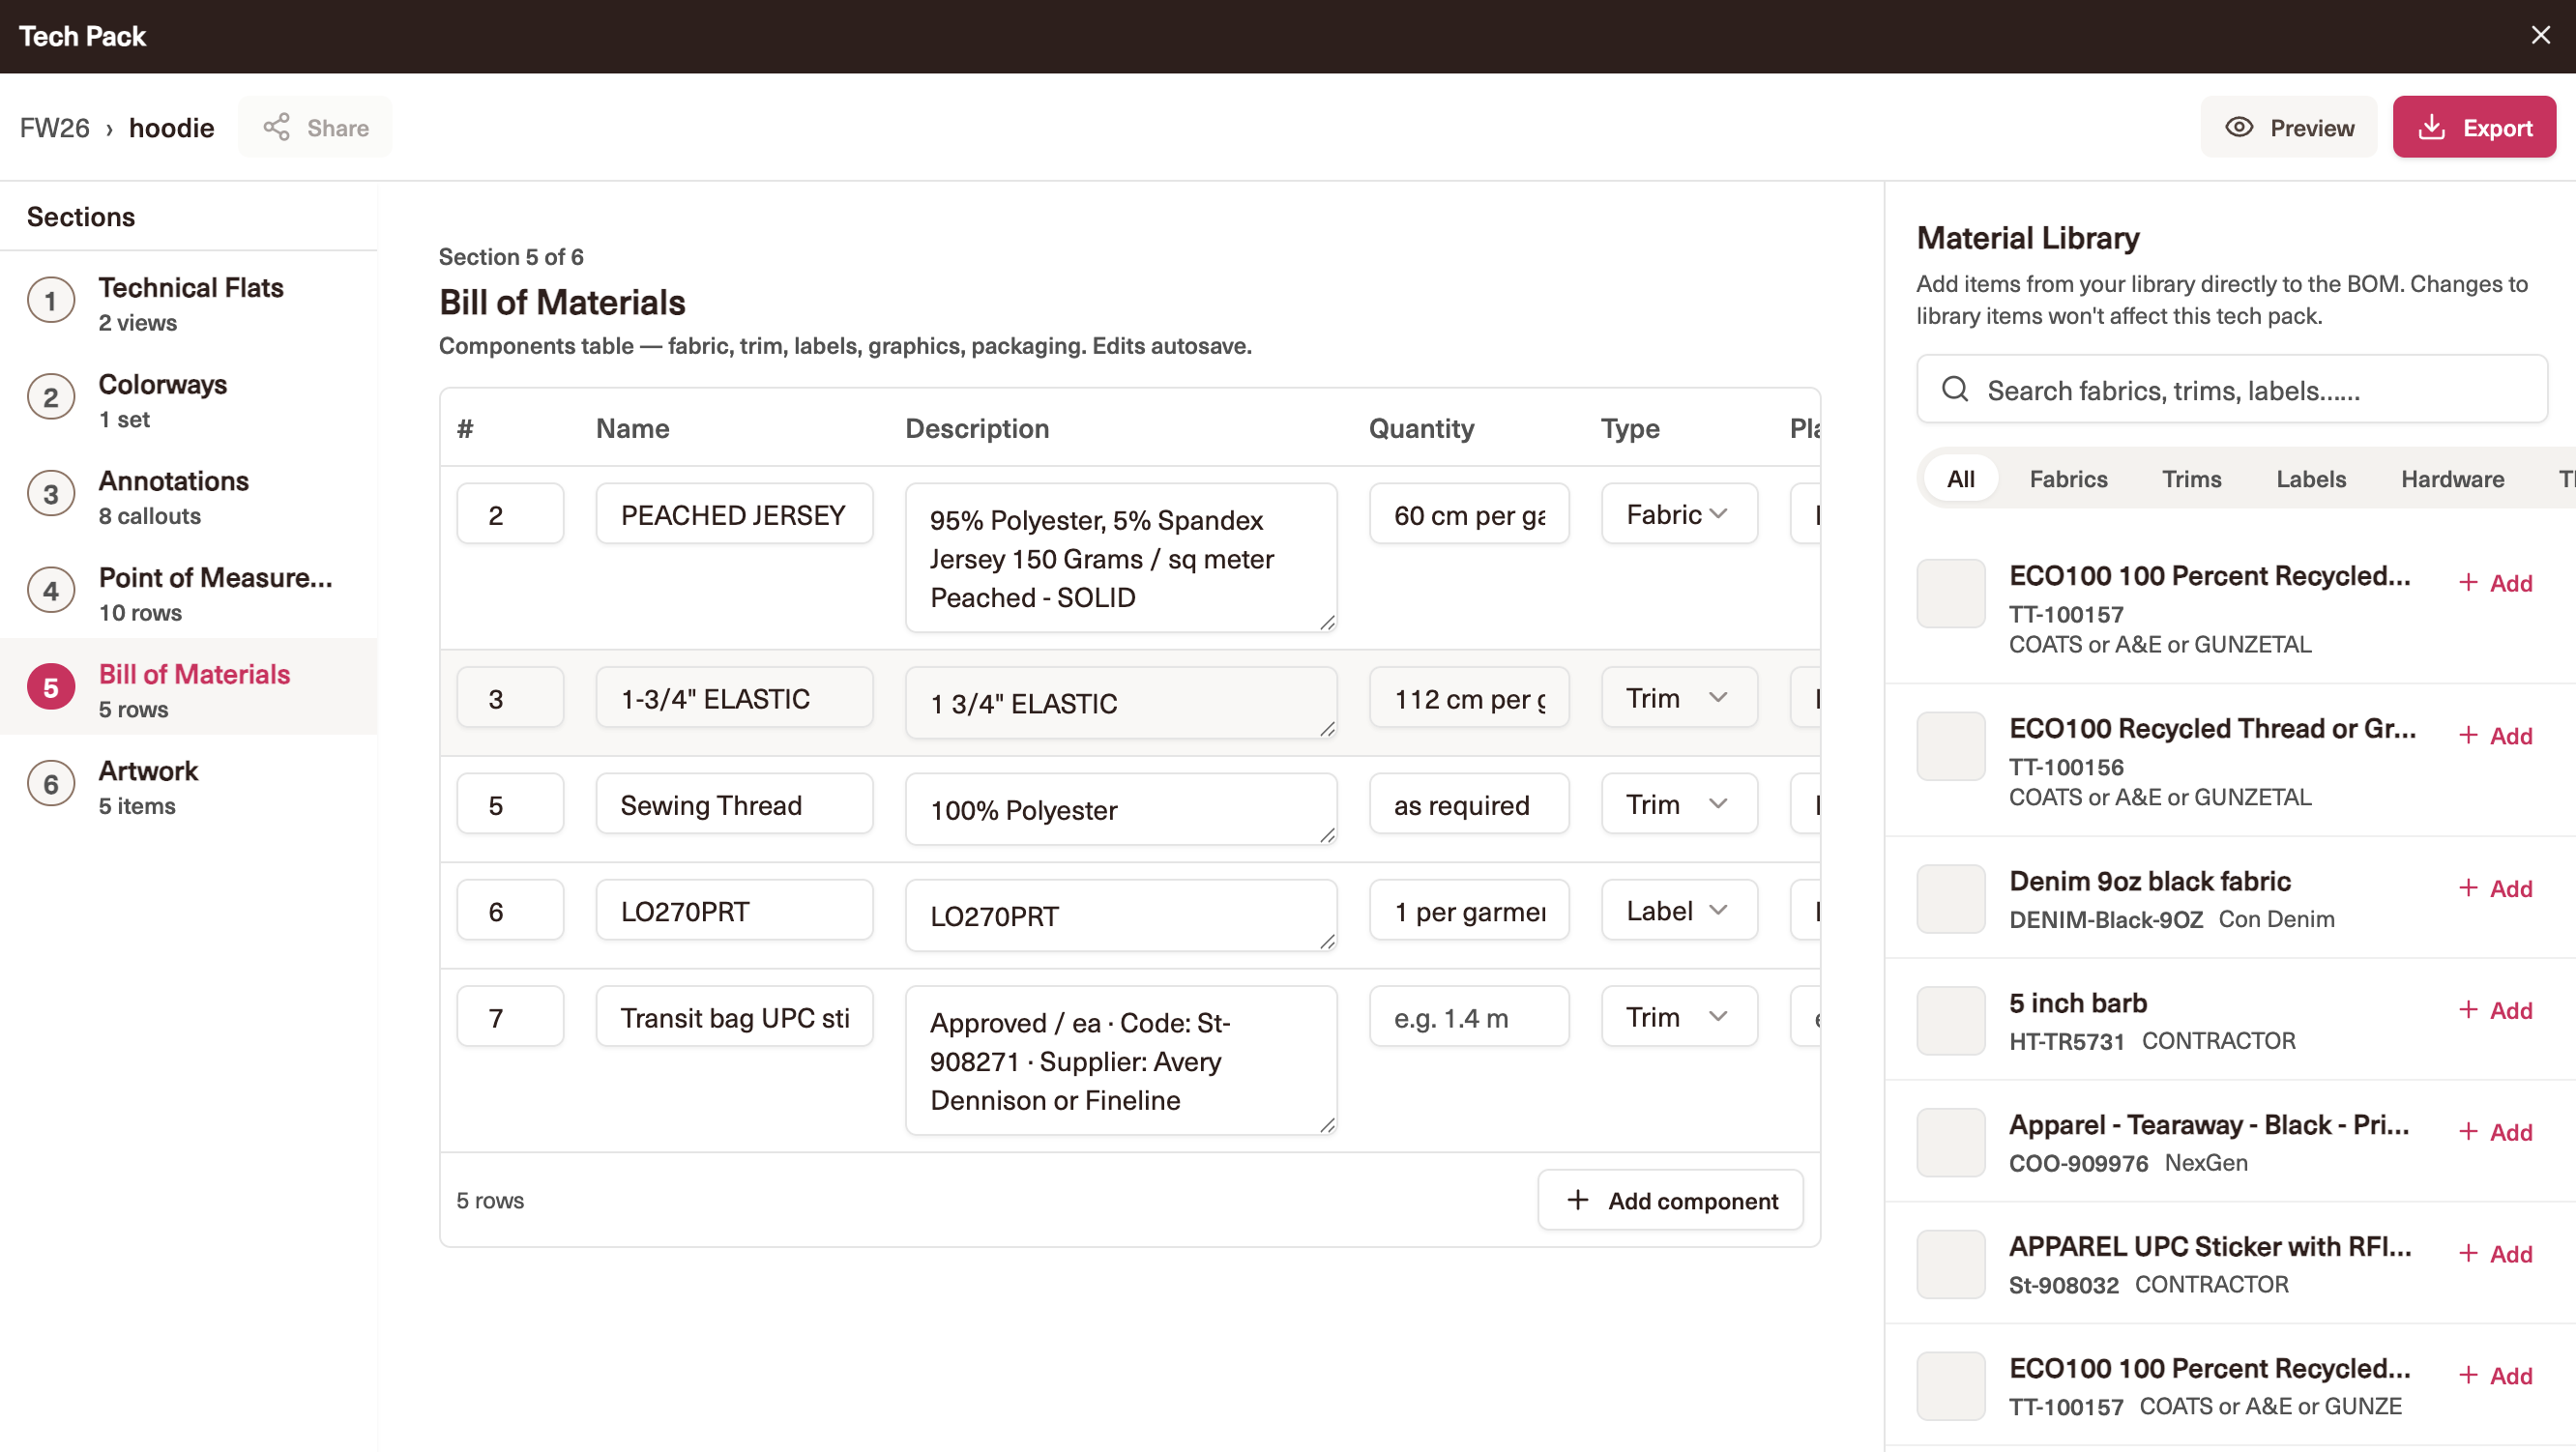
Adding saved materials to the Bill of Materials.
5. Regenerate a single flat
Hover a flat and choose Regenerate to redraw just that view, or Replace to upload your own image instead. Describe the change you want — for example, removing a chest pocket — and only that view is regenerated. Once you accept it, any downstream sections that may need another look are flagged for you.
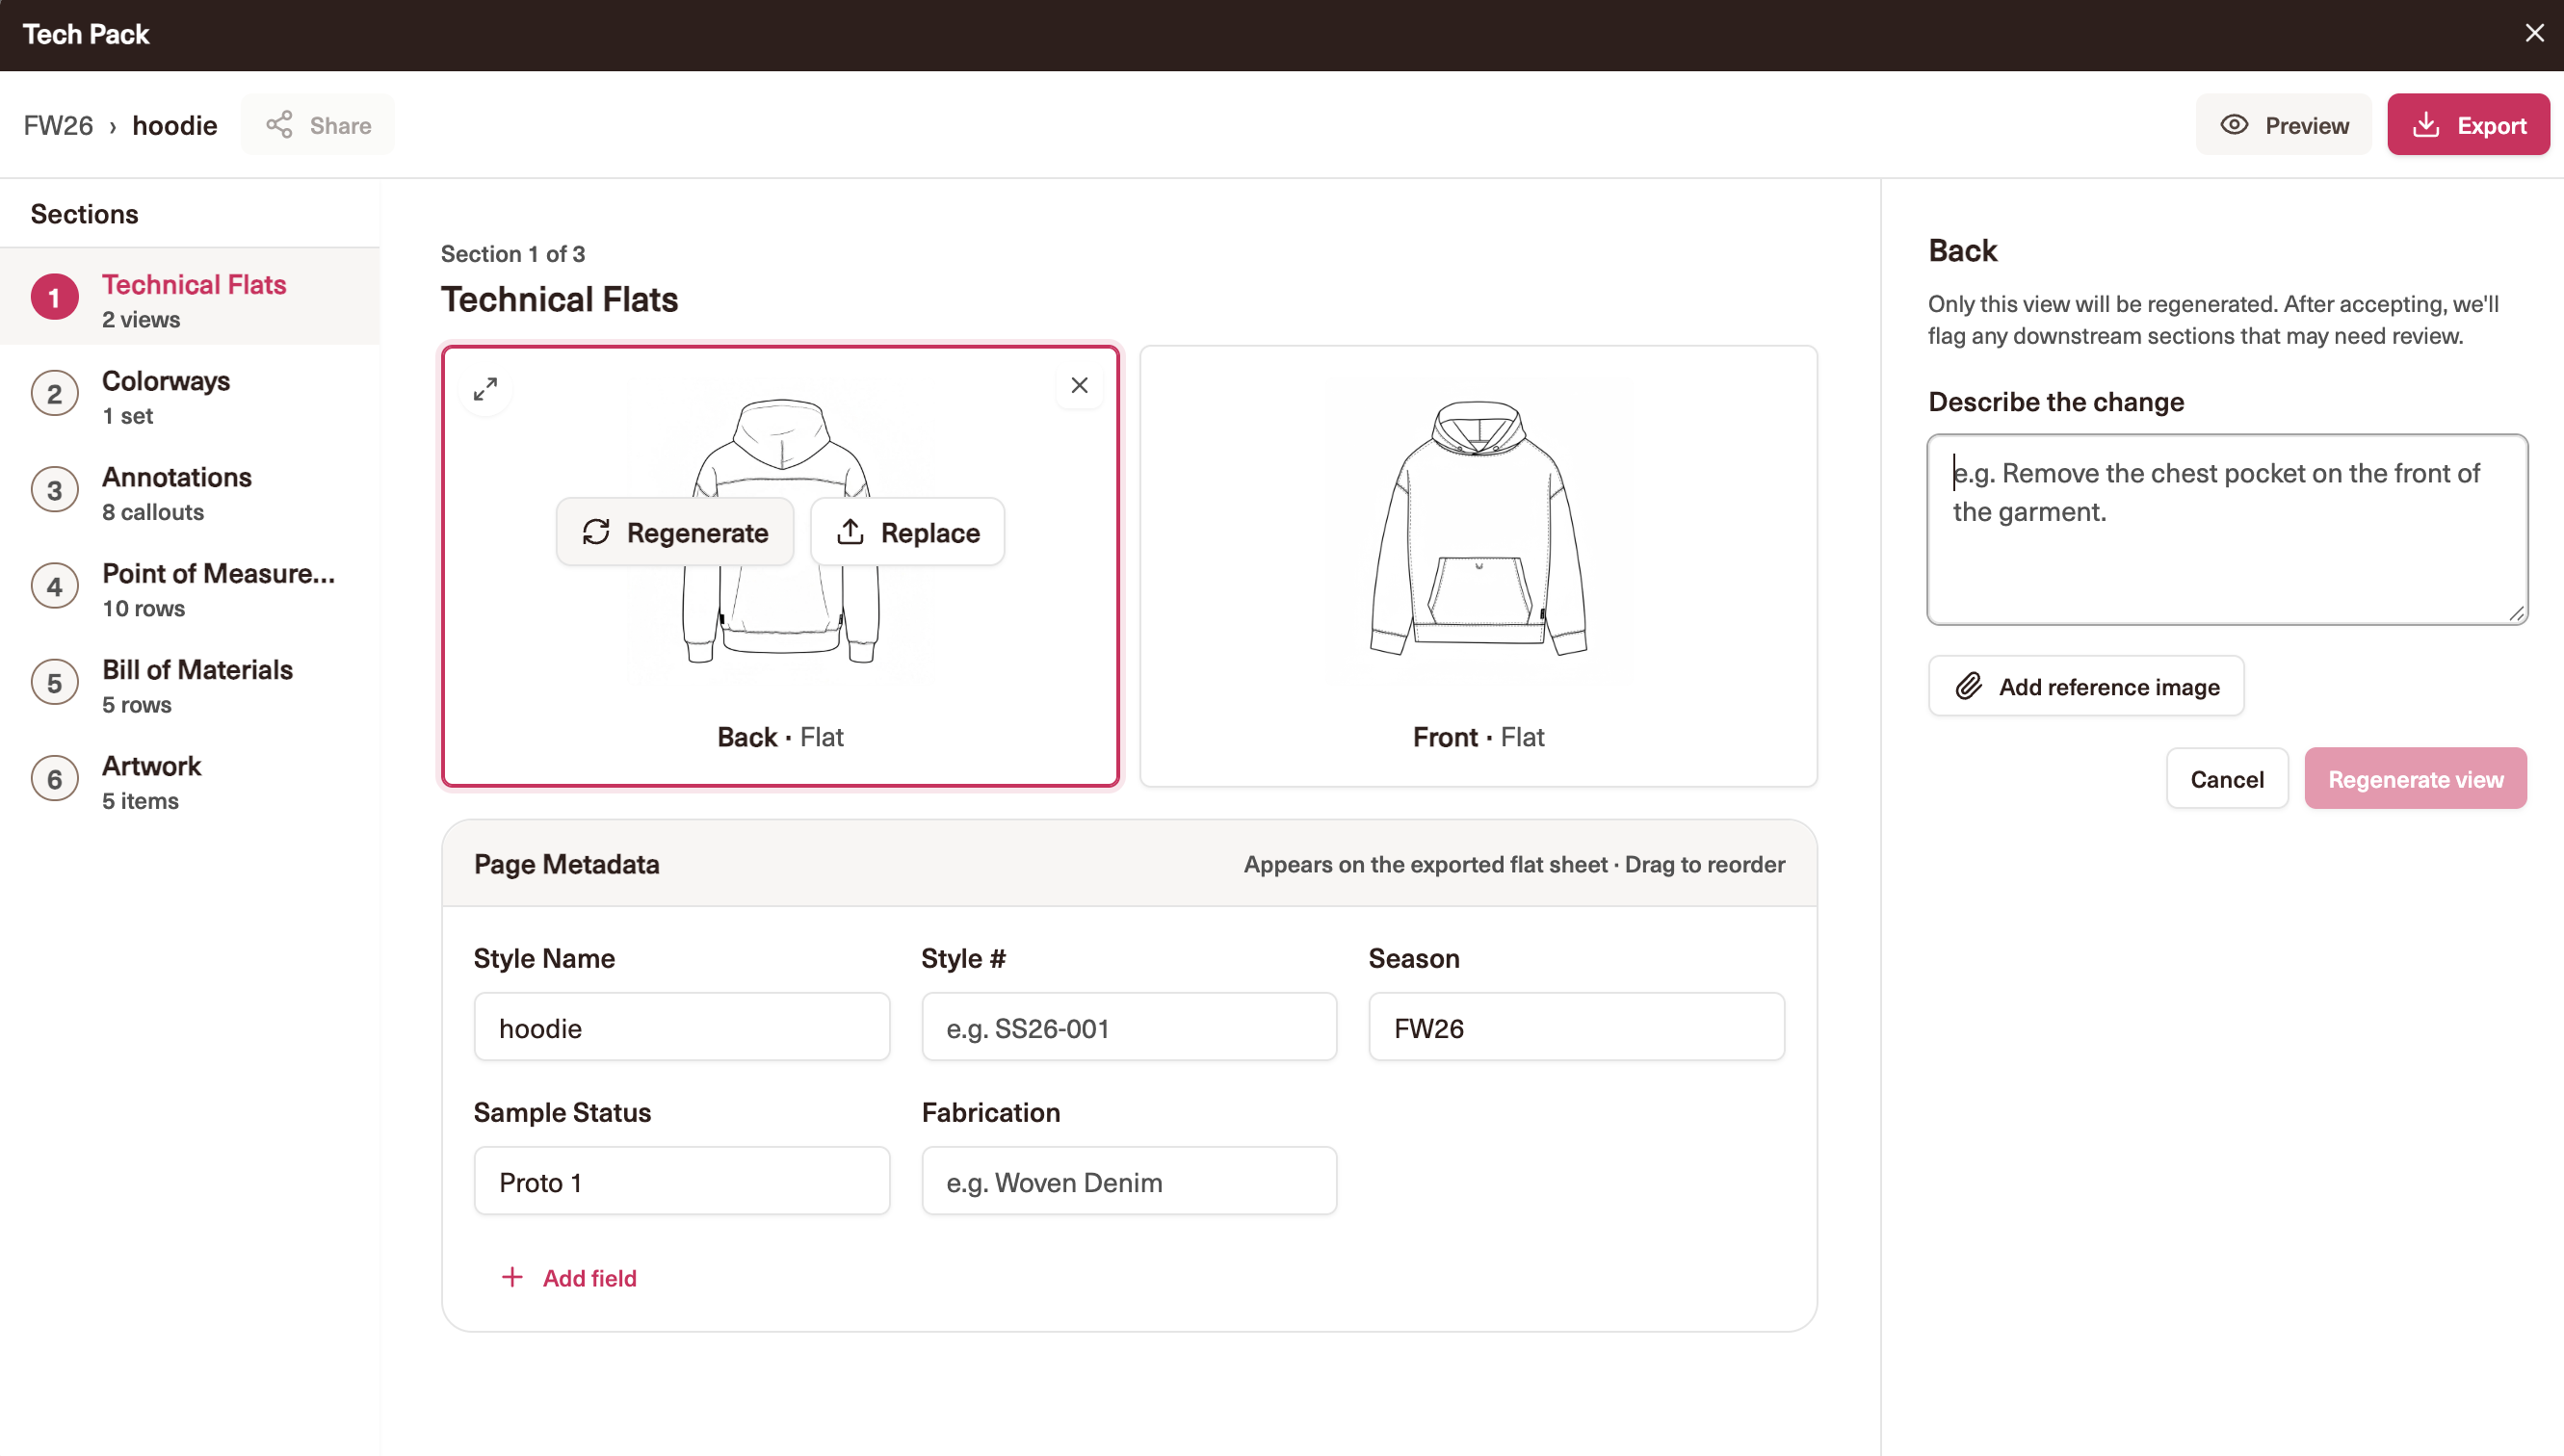
Describing a change to regenerate a single view.
7. Find everything in Products
Your Products area holds your style records: the BOM library of saved materials with codes, suppliers, and descriptions; your size charts; and every tech pack you have generated. Materials can be added one at a time or imported in bulk from a CSV.
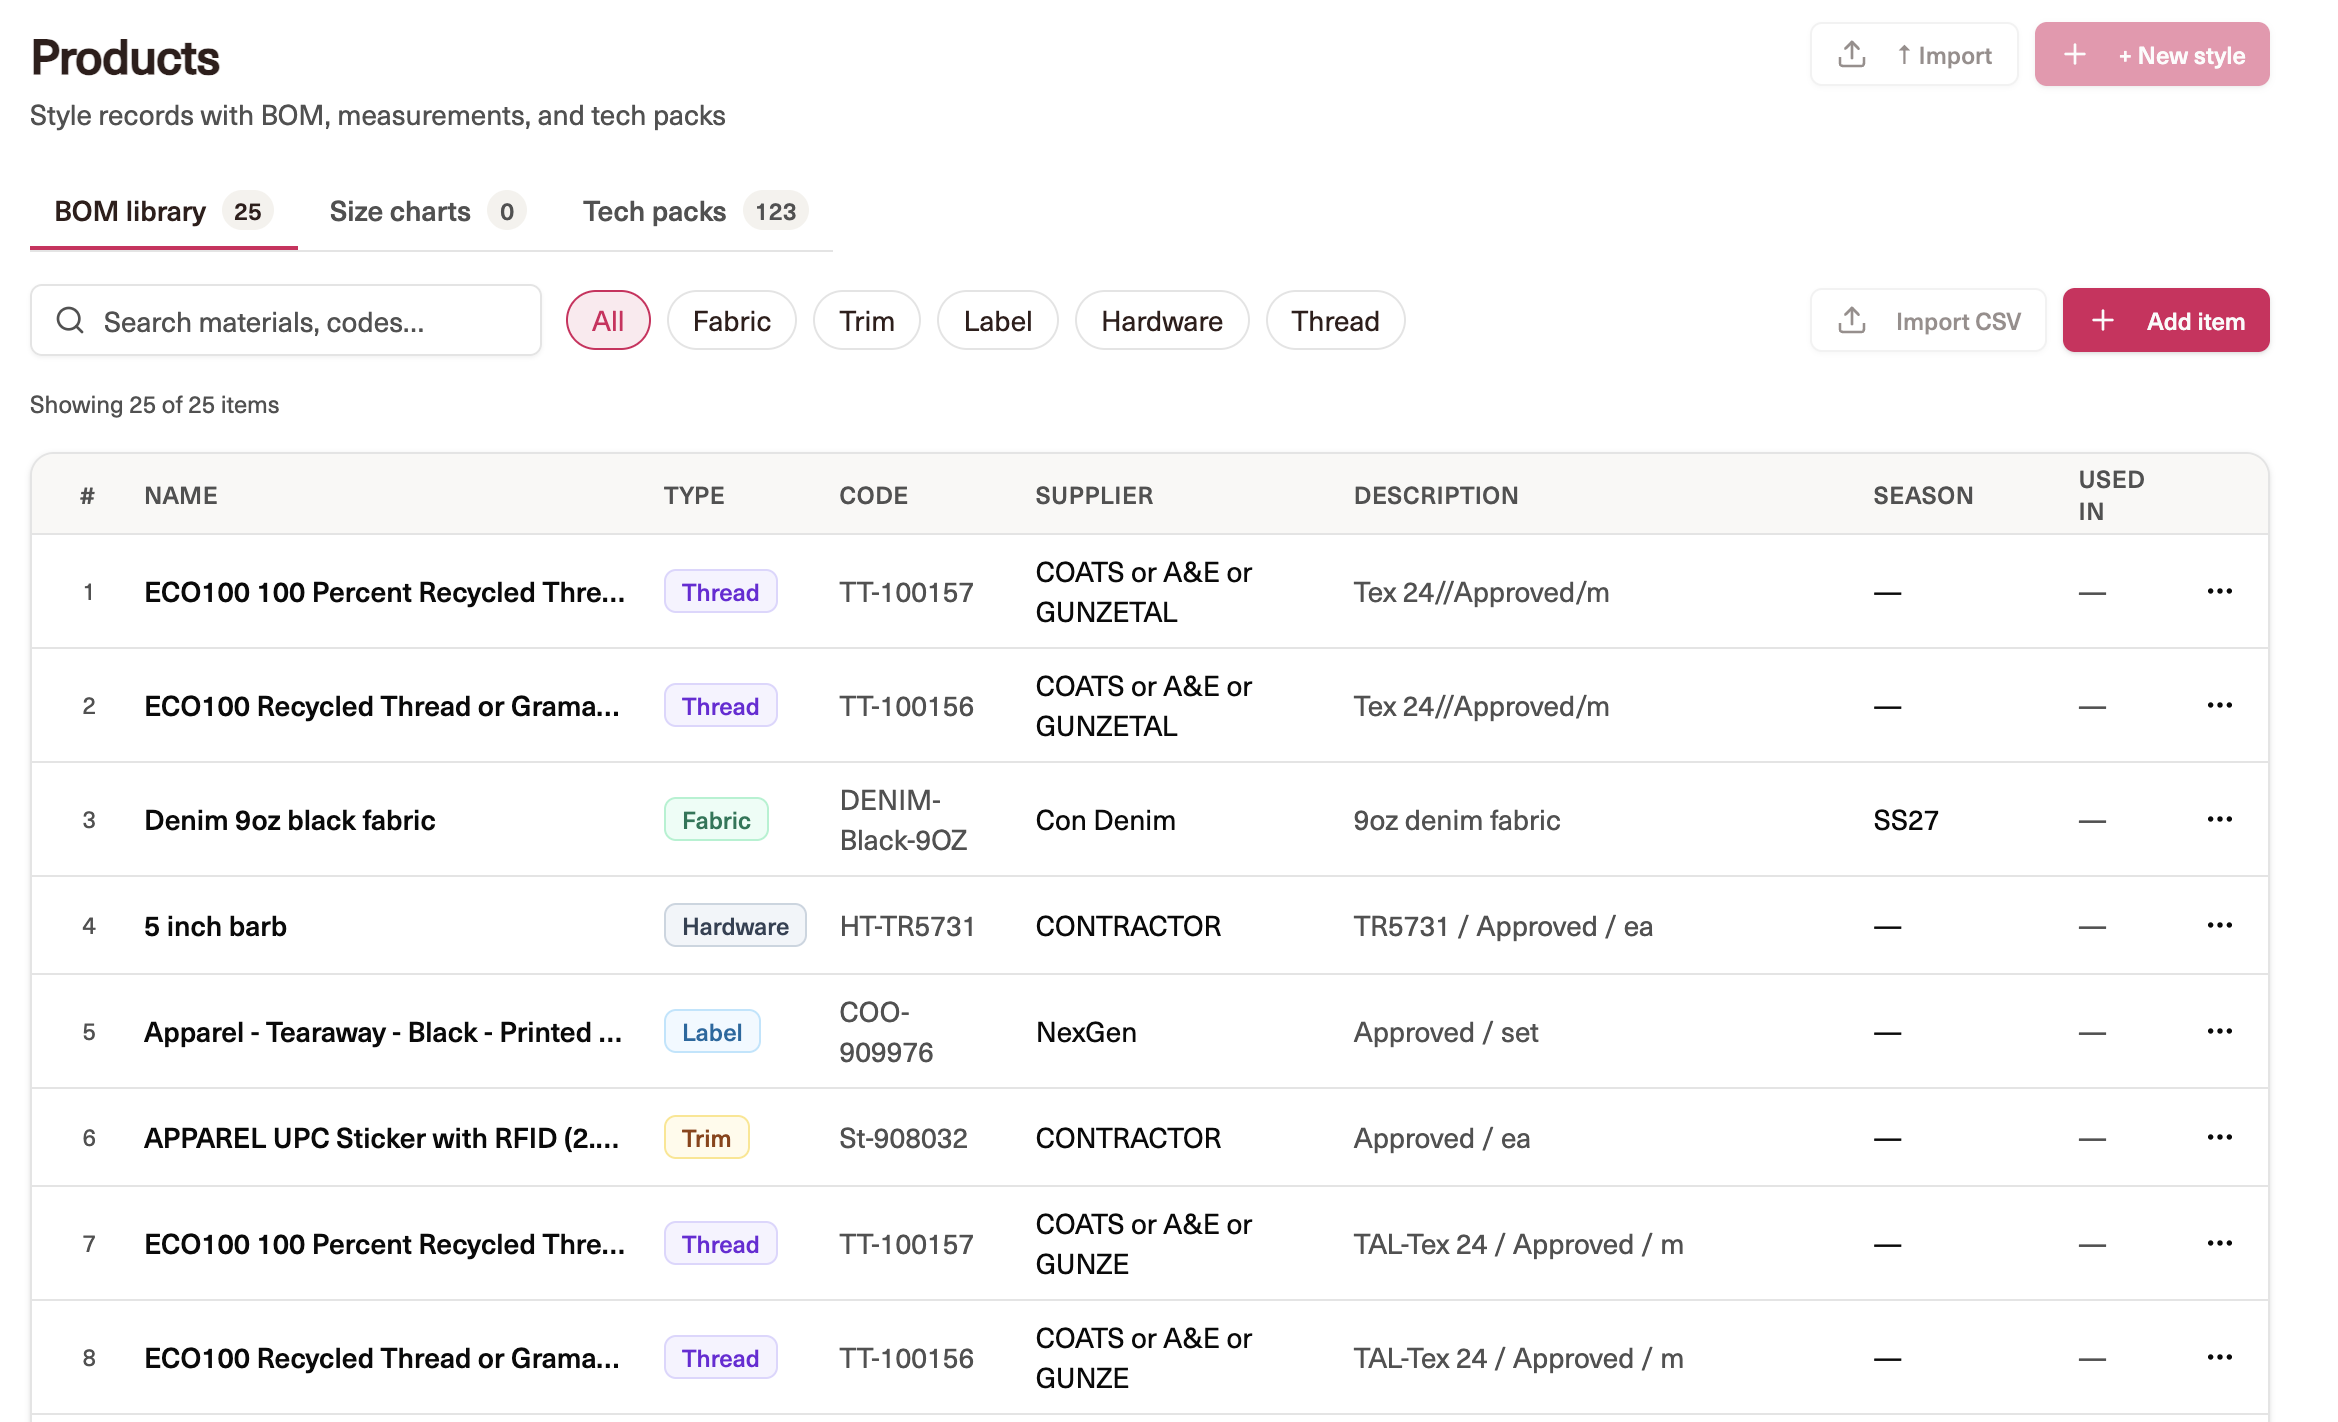
The Products area, showing the BOM library.
Tips for the best results
Attach a reference tech pack whenever you have one. It is the single biggest improvement to POM, BOM, and annotation match.
Use clear, unobstructed garment images. Obscured seams, folds, or shadows are the most common cause of an inaccurate sketch.
Regenerate anything that looks wrong.
Reuse materials from your library where relevant, so specs stay consistent across styles.
Always review generated measurements and annotations before sending a pack to a factory or other external partner.