Prints & Patterns
Seamless prints created from a text prompt and optional reference images
Select Tool
If not already selected, choose Prints and Patterns from the model selection dropdown at the top of the Create module.
Choose Generate Seamless Print
The default option is Generate Seamless Print which will allow you to create seamless, repeatable prints from a prompt and optional reference images.
Recolor is used to change the colors of a reference image of a print based on a prompt or a color reference image. You can either type in the colors you’d like to see, or upload an image to guide the palette. This will not generate a seamless print.
Extract Print from Garment allows you to isolate and reuse prints directly from garment or accessory images. Upload a photo of a printed garment, crop to the area with the print, and Raspberry will generate a clean, repeatable version for you to use in new designs.
Write a Prompt
Clarity and Precision


Tone
Describe the Print
We recommend prompts at least 5 words long. Describe exactly what you would like to see.
Writing a prompt
Prompt Examples


Add a Reference Image
Adding reference images is optional. When adding your reference image, you’ll choose Style Inspiration or Seamless Converter.
Uploading a reference image
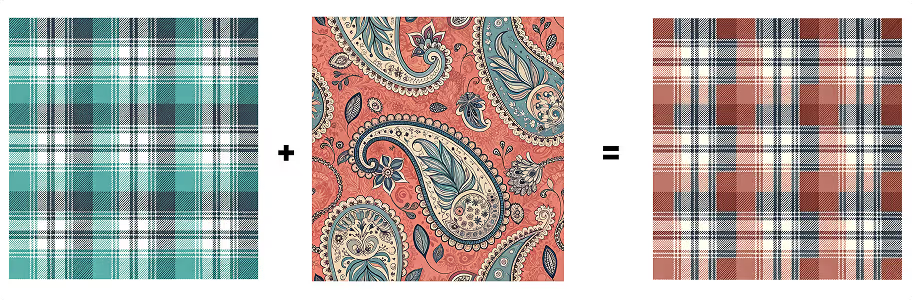
Style Inspiration
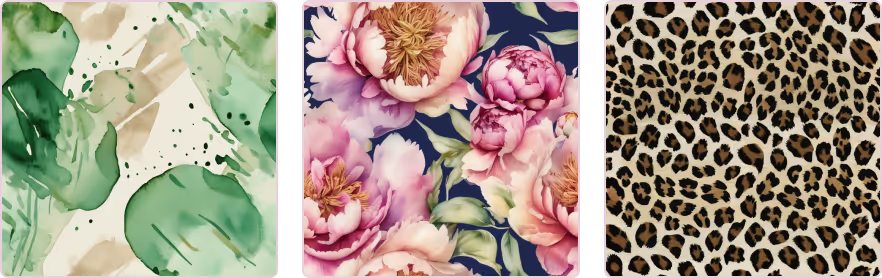
This choice allows you to use any image at all, along with your prompt to influence the colors and aesthetics of your print outputs. You have the ability to add up to three reference images as Style Inspiration. The examples below use the same prompt “A cascade of watercolor peonies” with different reference images.
There are three ways you can use this feature:
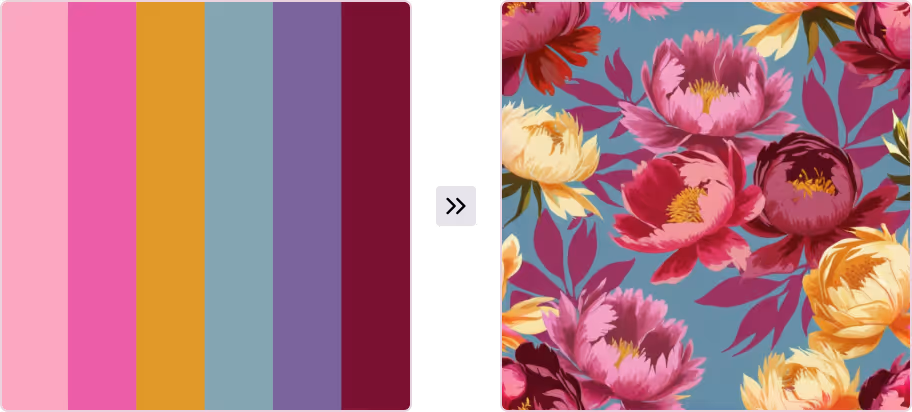
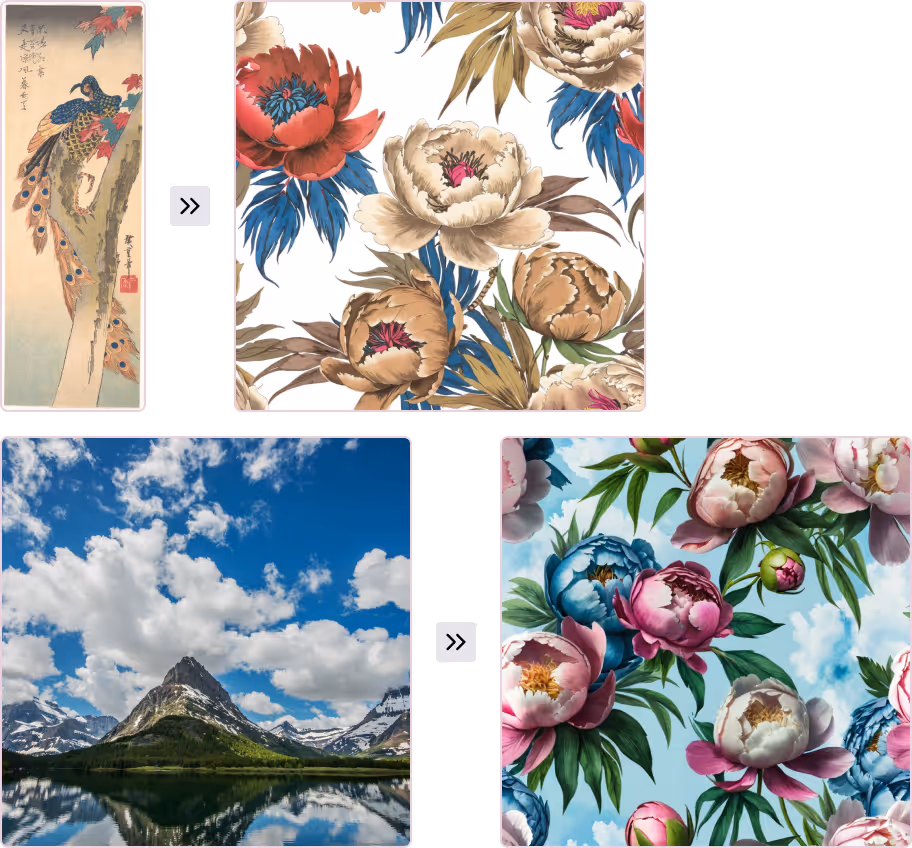
You can combine up to three images and adjust their influence using the sliders.

For yarn-dye patterns (stripes, gingham, plaid), use a similar pattern as your reference.
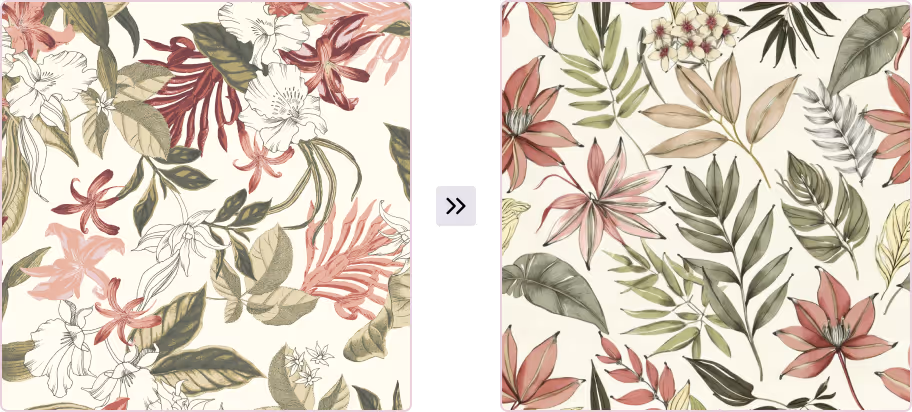
Seamless Converter
This choice is useful when you have a flat reference image of a print without a repeat. The Seamless converter will very closely follow the supplied reference image, and create a seamless repeatable print or texture by adding similar motifs and designs.
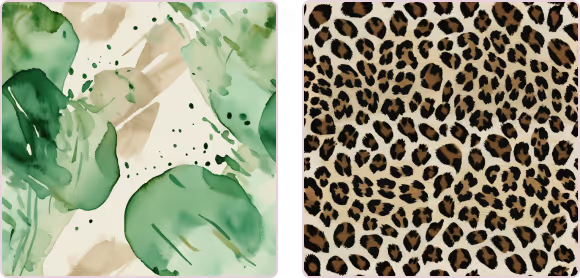
Advanced: Use Limited Color Palette

Checking this box will limit the generated print to between 2 and 12 colors.
Note: quality may degrade for complex prints (like florals or paisleys).
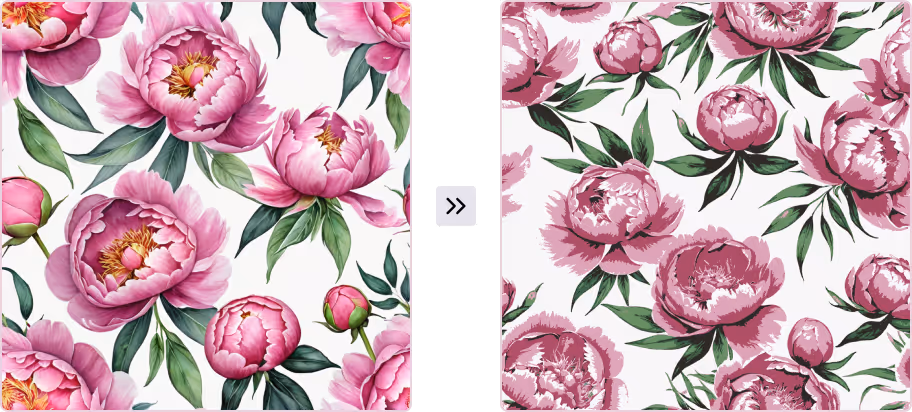
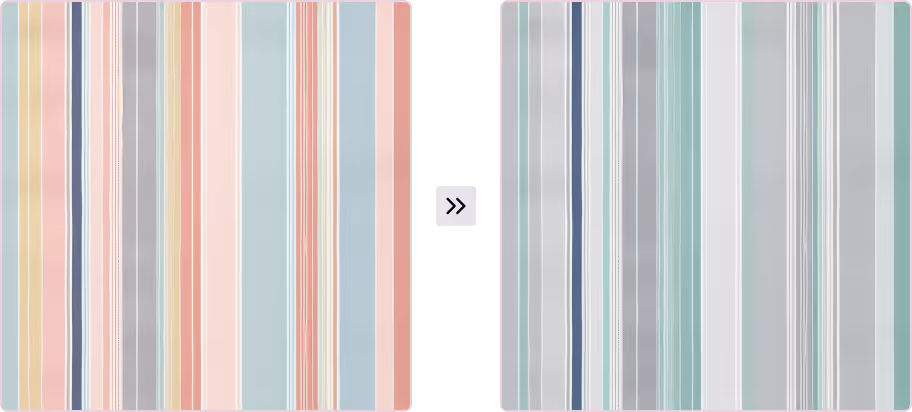
These examples use the same prompt. The print to the right features a limited number of colors in the palette.
You can now also create prints in a 16:9 rectangular ratio using the aspect ratio toggle, useful if your repeats feel too regular.
Preview Tiling
Click into your outputs to Preview print tiling at different scales.
Recolor
Recolor changes the colors of an existing print while keeping the motifs and structure intact. This is a quick way to visualize new color stories without redesigning the print.
Style Inspiration
This choice allows you to use any image at all, along with your prompt to influence the colors and aesthetics of your print outputs. You have the ability to add up to three reference images as Style Inspiration. The examples below use the same prompt “A cascade of watercolor peonies” with different reference images.
There are two ways to use this option:
For yarn-dye patterns (stripes, gingham, plaid), use a similar pattern as your reference.
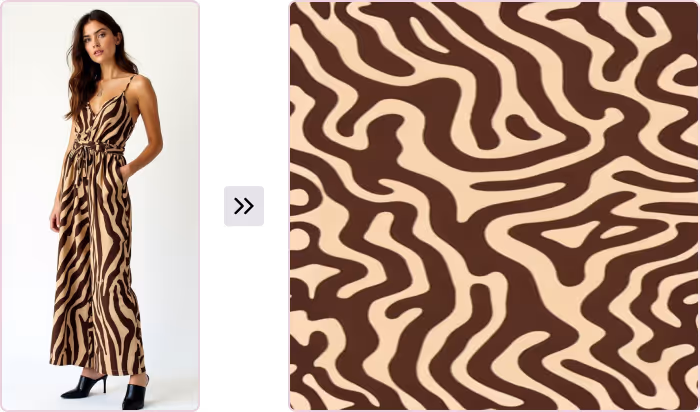
Extract Print from Garment
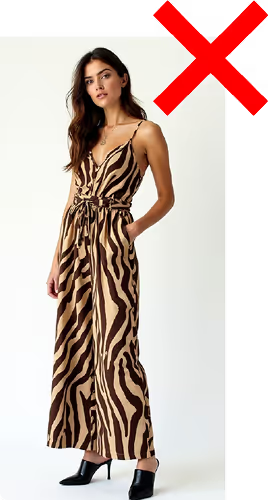
Extract Print from Garment allows you to pull a print directly from a photo of a garment or accessory, and turn it into a repeatable print you can reuse.
To use it:
This is especially useful if you generate an image in Lifestyle Photography or Product Images that has a print you’d like to reuse. For example, you can pull a zebra print off a jumpsuit and then apply it to new garments in other tools.
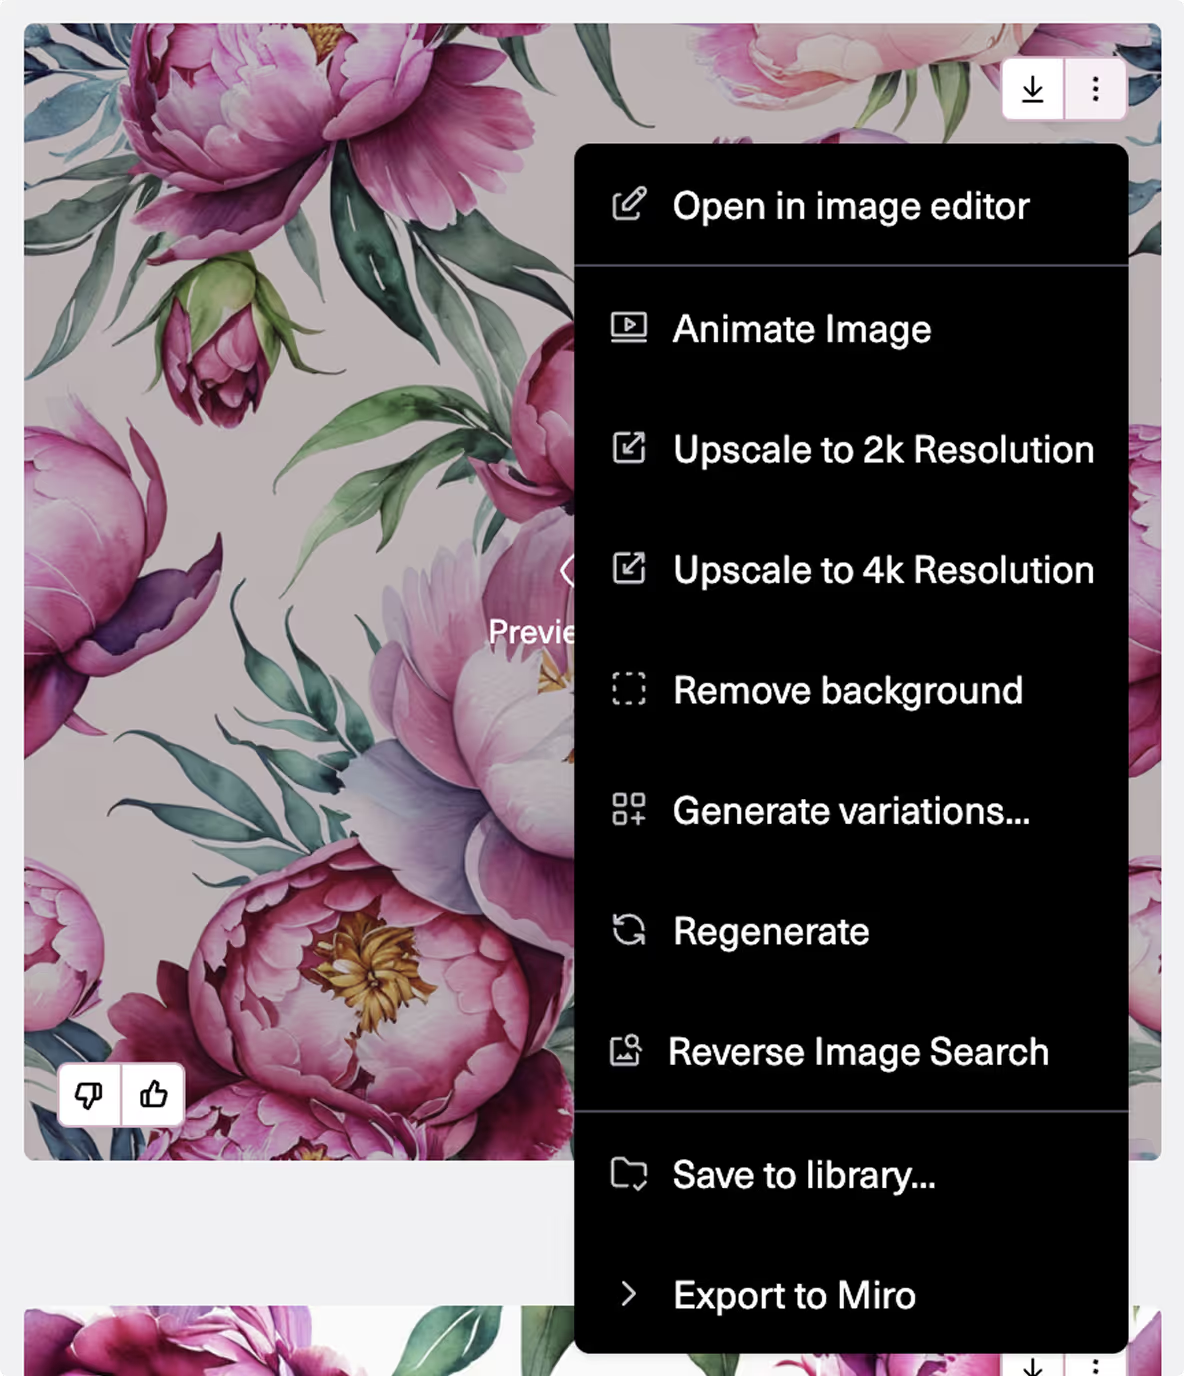
Save Options
Use the download arrow to access export options for your image.
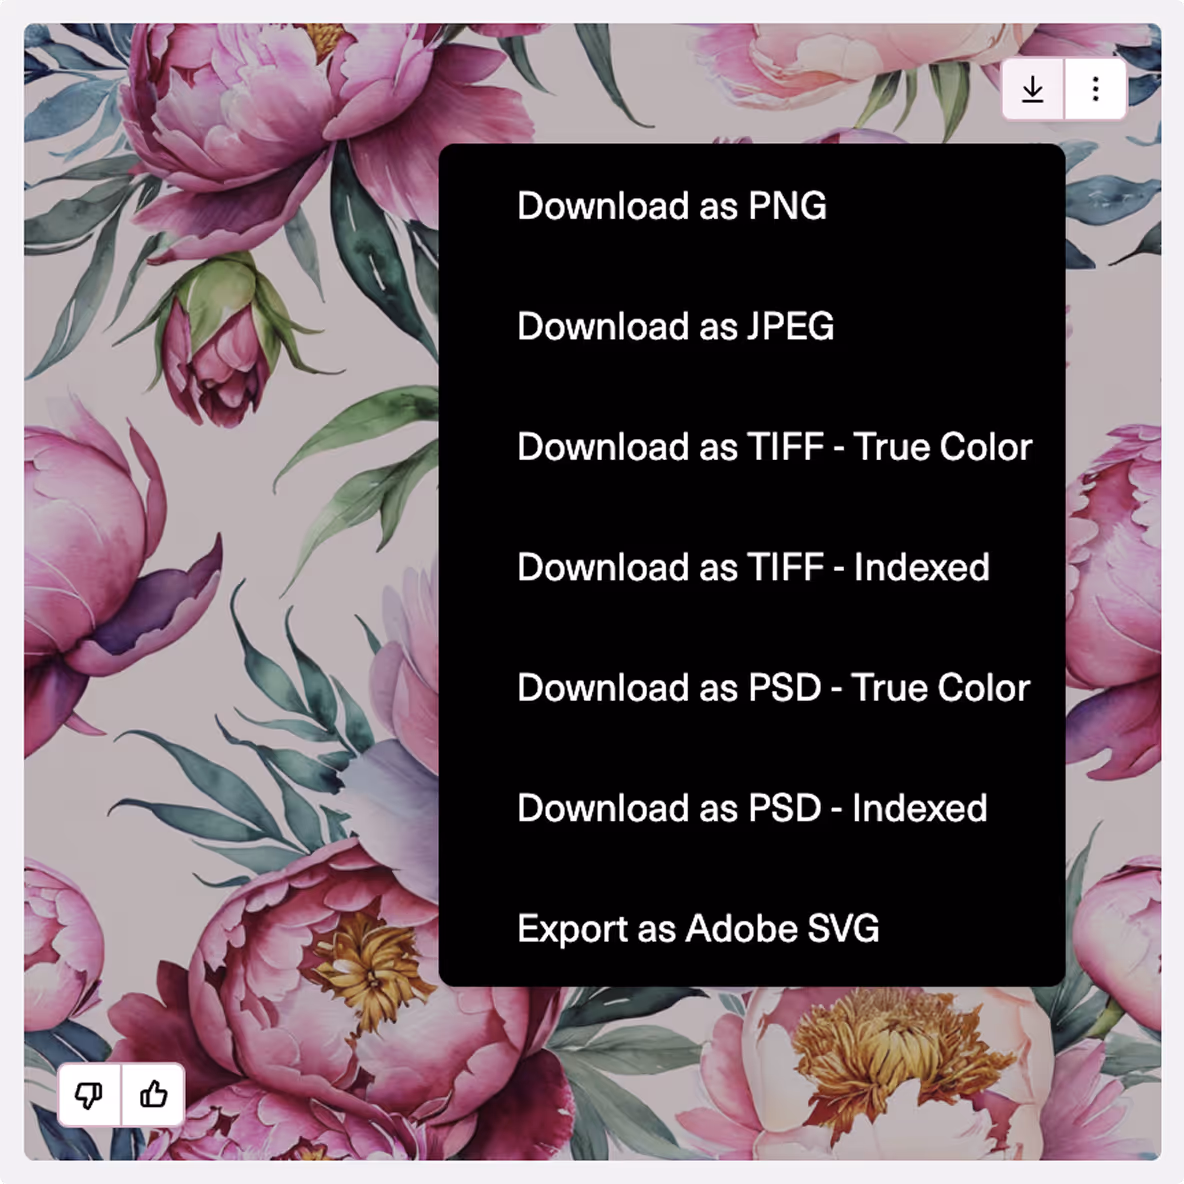
The three dots next to the download arrow hold many options you can choose to keep working on your image.