Presentation
Sketch-to-Render
Raspberry AI
Presentation

Sketch-to-Render

Take your 2D sketches to Photoreal 3D renders.

1

Select Tool

2

Add a Reference Image

Upload Reference Image

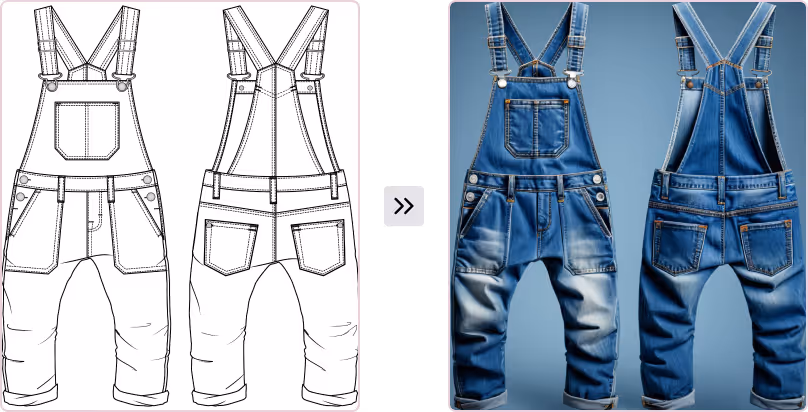
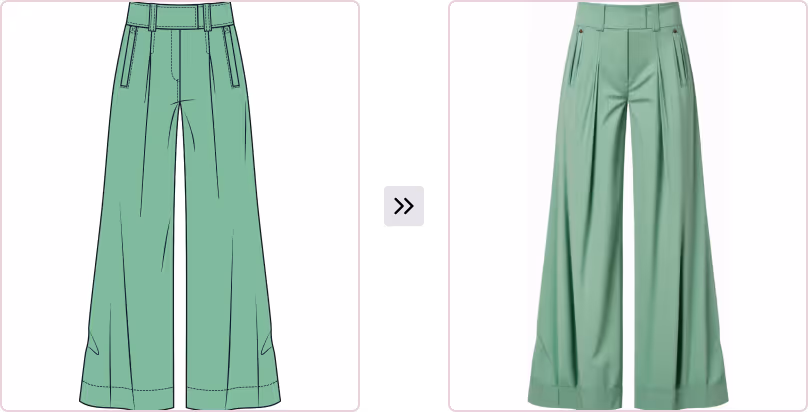
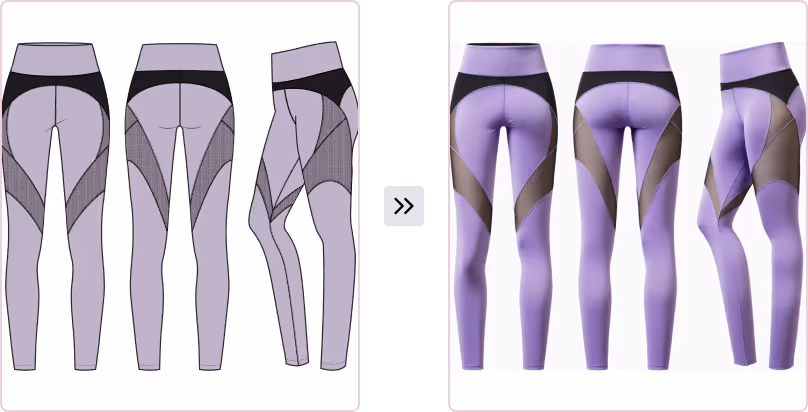
Add your 2D sketch, and choose if your sketch is black and white, or color guided (a sketch with color). This should be the Reference Sketch, NOT your desired output.

Choose the desired output format. Ghost Mannequin will create a body shape, while Flat lay will render the product flat as if you are taking a picture from above of a product laid flat on a table.

Uploading a reference image

Sketch Influence: Is set at a default of 95%, this denotes how closely the renders will follow the sketch. 95 - 100% leads to the most accurate results.

Describe Image

You can click Describe Image to get a description of the product, or write your own prompt.

Generating a prompt using Describe Image

TIP

Describe image will add the words “a technical flat drawing” or “a technical sketch” to the description. For best results, delete any reference to the sketch so the outputs are photoreal.

3

Write a Prompt

General Tips

Clarity and Precision: Specify the color, material, and design in detail, while noting background color or if your sketch has a front and back.

Tone: Aim for a descriptive tone with your prompts, avoiding command words such as “add”, “create”, “transform”, “change”. Be repetitive! Use repetition to reinforce details that may be missed.

Dimensions: The output will be the same dimensions as the input.

Describe the Product

We recommend prompts at least 5 words long. Describe exactly what you would like to see.

Writing a prompt in Sketch-to-Render

Characteristic
Examples
Color
hunter green
dark pink
gray
navy
Product
bootie
pencil skirt
men’s blazer
wide-leg pants
Material
cotton
satin
denim
leather
Background
on a white background
on a black background
Other
contrast panels
flap pockets
darts
stitching

Prompt Examples

Format 1 - Simple
Color
Material
Product
Your prompt can be short and simple! It only needs to include the color, material, and description of the product. If your sketch has a front and back, please describe both.
A solid gray wool men’s blazer.
Medium blue wash denim child’s overalls, front and back.
Green twill pleated pants.
Format 2 - detailed
Color
Material
Product
Background
Other
You can have more control over the outputs by describing the color of the background or other features of the garment. Repeat details and colors if they are missed in your first outputs.
A pink satin cocktail dress on a white background.
A cream and brown sherpa lace-up ankle boot with a rounded toe. The boot has a stitch detail on the upper and a solid sole.
A pair of lavender spandex high waisted leggings with a black curved yoke. There are black mesh panels at the sides of the legs and the back of the thighs. The leggings are presented in three views - front, back, and side.
5

Save Options

Use the download arrow to access export options for your image.

Option
Description
Download as PNG
High-quality image with transparent background.
Download as JPEG
Standard image file for easy sharing.
Download as TIFF - True Color
Uncompressed image with full color detail.
Download as TIFF - Indexed
Smaller file with limited colors.
Download as PSD - True Color
Photoshop file with full color for editing.
Download as PSD - Indexed
Photoshop file with limited colors.
Export as Adobe SVG
Vectorizes the image in a format that can be opened in Adobe Illustrator.

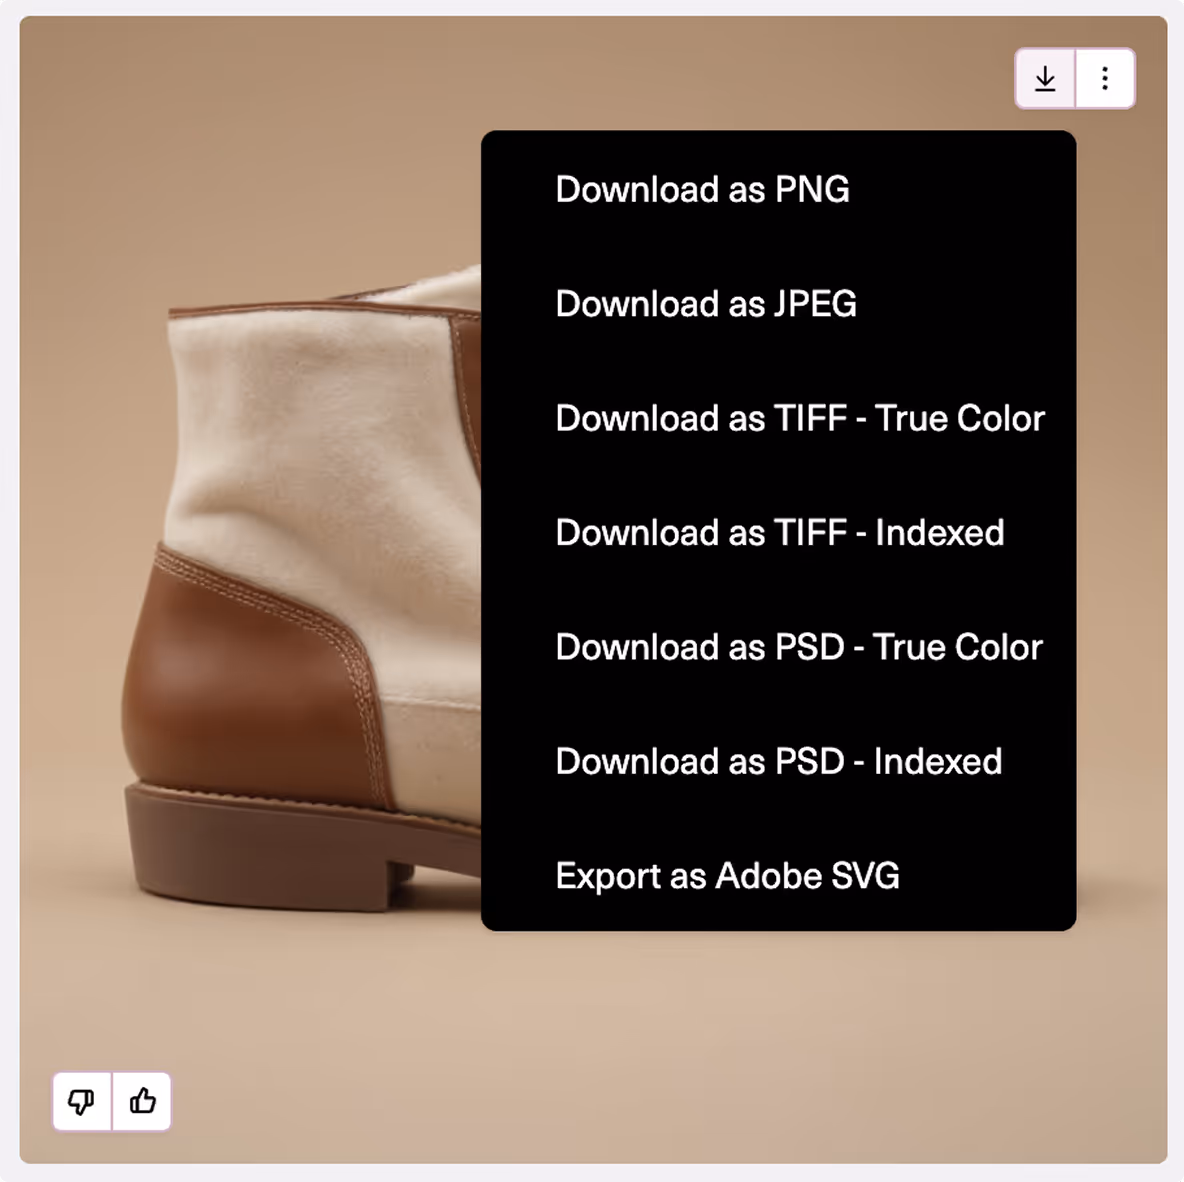
Click the three dots next to it for additional tools to continue editing your image.

Option
Description
Open in Image Editor
Opens the chosen image in the Edit module.
Upscale to 2K Resolution
Increases resolution to 2K.
Upscale to 4K Resolution
Increases resolution to 4K.
Remove Background
Deletes the background of the image, leaving the model.
Regenerate
Regenerates just the chosen image.
Reverse Image Search
Instructions on how to use Google Lens to search for similar images.
Save to Library
Saves the image to your personal cloud library in Raspberry.
Export to Miro
Exports the chosen image to a Miro board.