


Make Garment Alterations with AI Prompts
Use AI Prompts to make alterations to images.

UI Overview

Top Bar
Right Tab Bar
Choose or Drop File
AI Prompt Panel
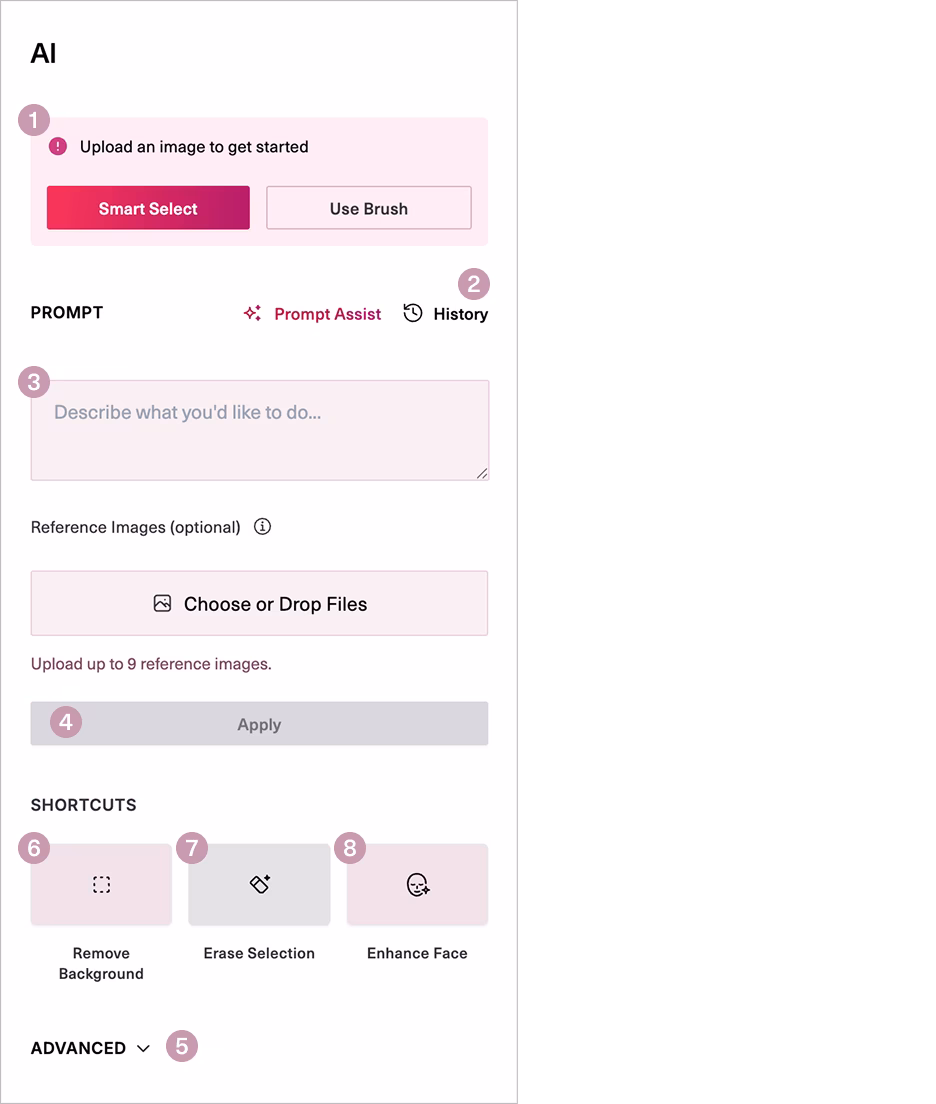
Tools

Elements
Upload Image
Create a Mask

After uploading your image, you have the option of drawing a mask. You’ll Smart Select or Draw a mask over the area of your image you would like to change. Masks allow you to target specific areas without changing the entire image.
You can also use AI Prompts without a mask. Raspberry AI will make changes to the entire image to harmonize it.
Smart Masks
Smart Masks allow you to select and de-select large areas of the image. If “Add Smart Mask” selects areas you do not want to change, you can click on those stray areas using “Exclude Smart Mask”.
Draw Masks
Draw Masks allow you to use your mouse to draw a mask over your image. You can use “Draw Mask” to add a mask and “Remove Mask” to erase areas of the mask.
Write a Prompt
Specify what you would like to change, including design, color and material.
Aim for a descriptive tone with your prompts.
You can type prompts like “Make the sleeves shorter”, “Cuff the jeans”, or “make the tee shirt blue”.
You can prompt for anything. Describe exactly what you want to see.
Your prompt can be short and simple! It only needs to include the description of the change you would like to make, including color, material, and description of the design. Hit Apply to begin generating 4 options to choose from.
Shortcuts

Save Options
Use the download arrow to access export options for your image. You can also Save to your personal Library in Raspberry AI.