Raspberry × Trasix Integration: How to Seamlessly Bring AI Designs Into Your Product Planning Workflow
The Raspberry and Trasix integration connects AI-powered design creation with long-term product planning—helping brands move faster from concept to assortment without breaking existing workflows.
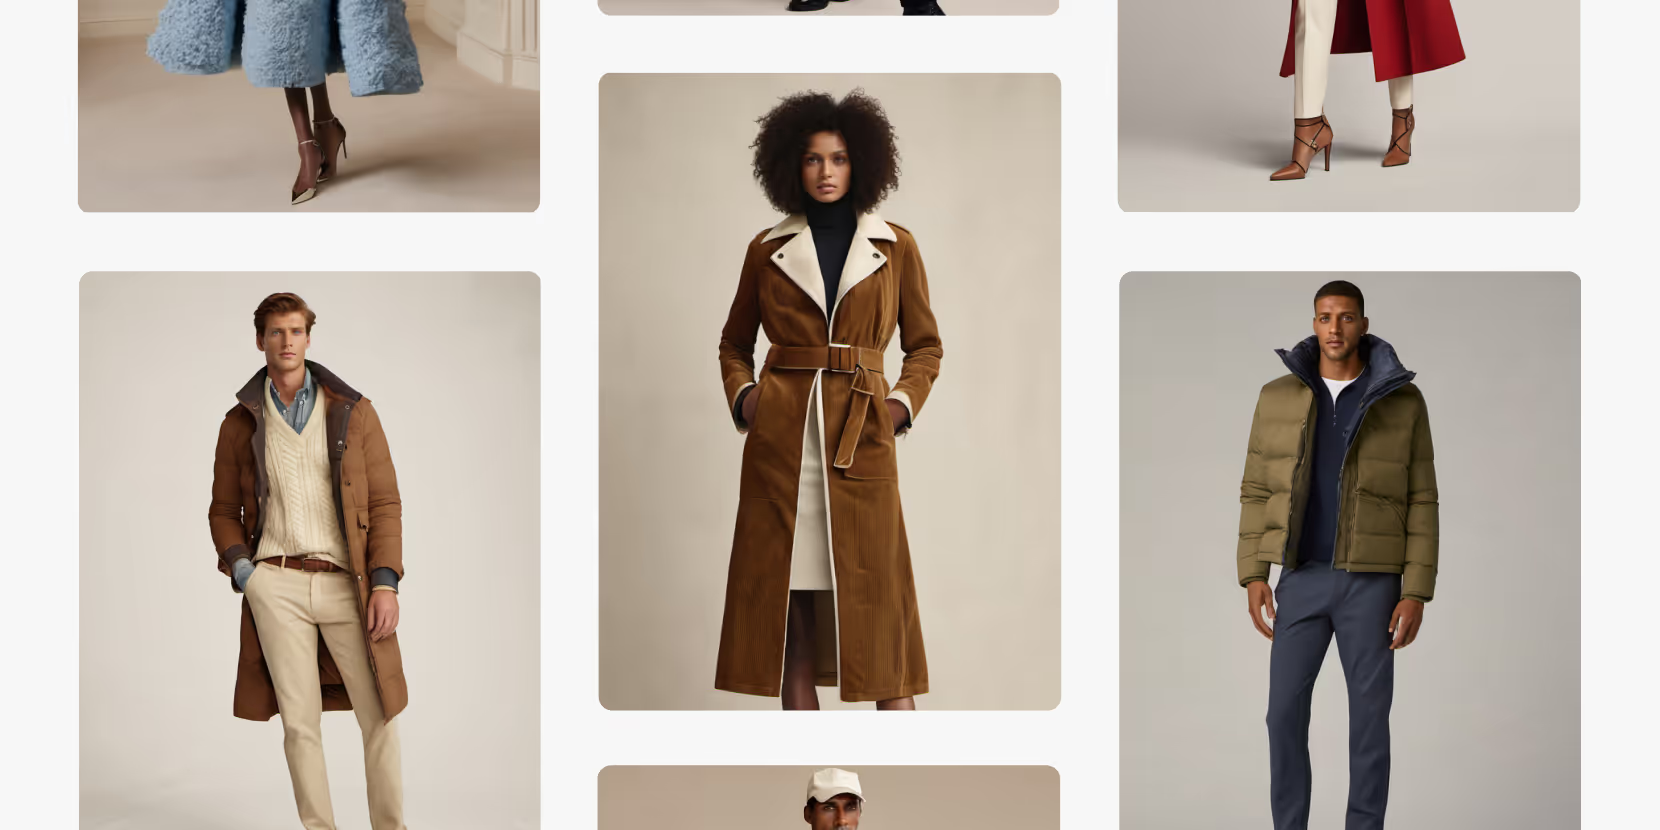
By enabling designers to export AI-generated designs directly into Trasix, this integration ensures that creative work is immediately available across merchandising, planning, sales, and design teams in one shared visual environment.
What Is Trasix?
Trasix is a collection planning and visualization platform that allows brands to plan assortments years in advance while maintaining a single source of truth for:
- Product master data
- Digital assets
- Assortment structure
- Cross-functional collaboration
Merchants, planners, designers, and sales teams all work from the same visual workspace, reducing handoffs and misalignment throughout the product lifecycle.
The Design Workflow: From Slots to Final Styles
In Trasix, teams begin by creating product “slots”—placeholders for future styles within a collection. These slots represent planned products before final designs exist.
Designers then:
- Generate creative options in Raspberry AI
- Explore variations, prints, patterns, and colorways
- Export selected designs directly into Trasix slots
These exports can represent either early design concepts or final approved assets, making them instantly visible and usable across the Trasix ecosystem.
The Integration Vision
The core vision of the Raspberry × Trasix integration is simple:
Designers work where they create best (Raspberry AI), and planners plan where they plan best (Trasix)—with no manual handoff in between.
Designs created in Raspberry AI can be exported directly into specific Trasix slots as design options or final assets, ensuring that creative decisions flow seamlessly into assortment planning, reviews, and downstream execution.
How to Use the Raspberry × Trasix Integration (Step by Step)
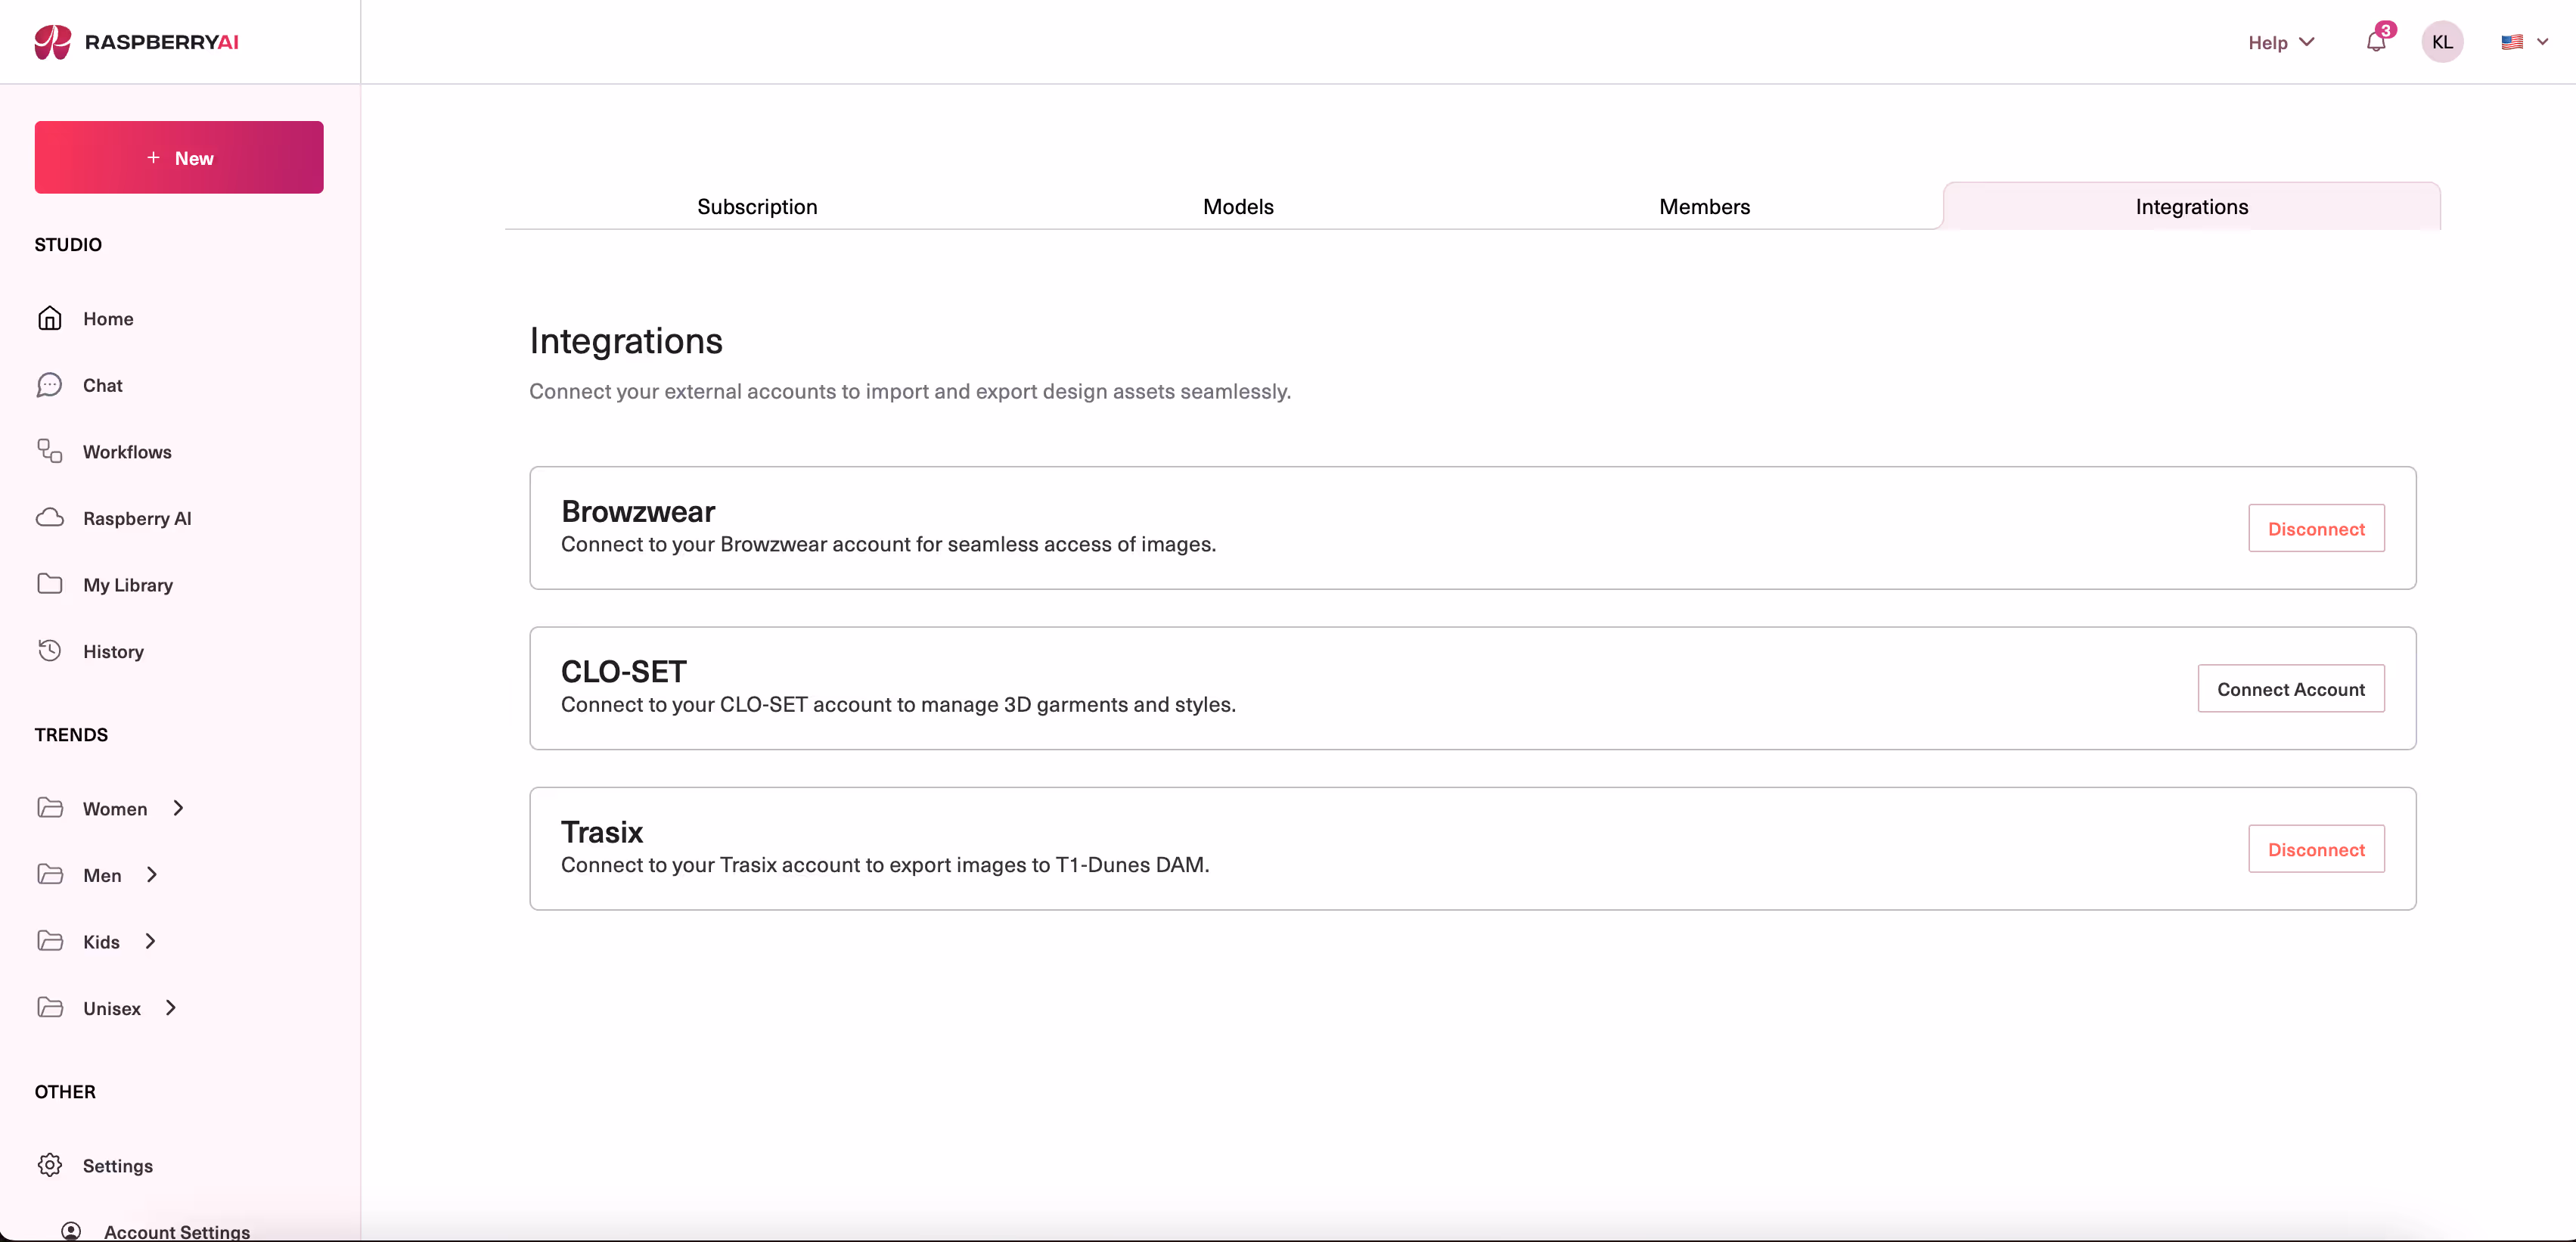
Step 1: Access the Integration Settings
- Go to Team Settings in Raspberry
- Open the Integrations tab
- Scroll to find the Trasix integration (disconnected by default)
Step 2: Authenticate the Integration
- Click on the Trasix integration
- An authentication modal will appear
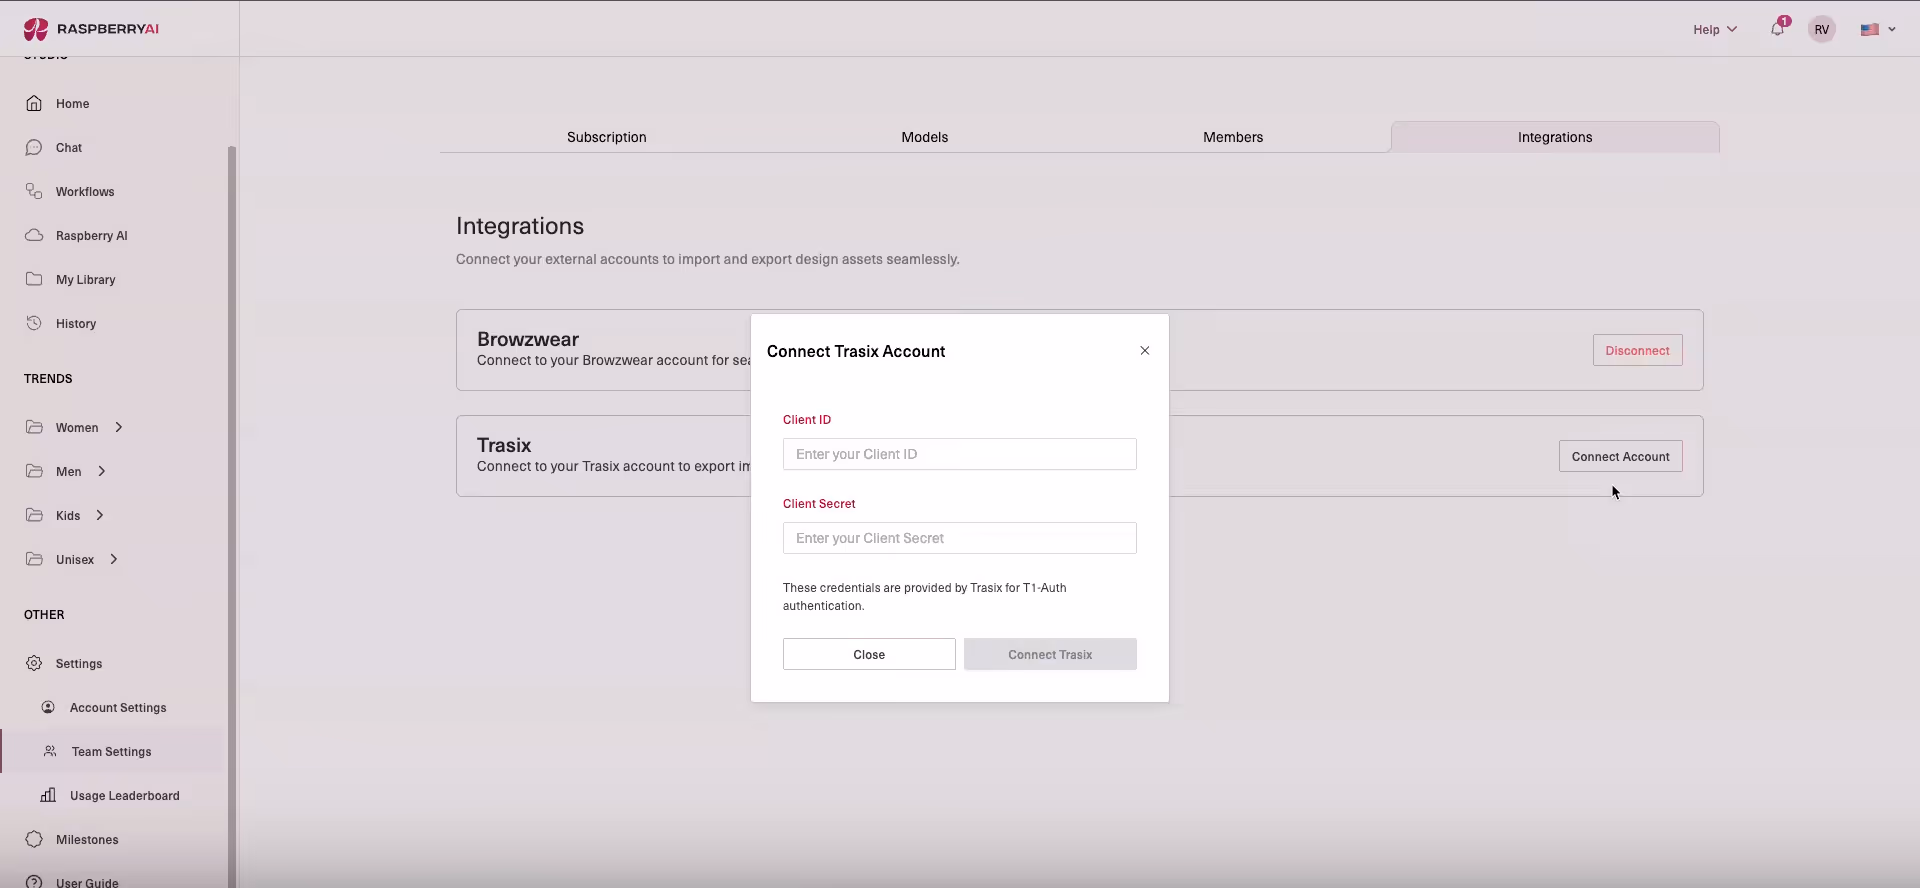
You can authenticate in two ways:
- From an export flow:
Three-dot menu → Export to → Trasix - Or directly from Team Settings → Integrations
- Enter the Client ID and Client Secret provided by Trasix
- Complete authentication
Once connected, the integration status will update to Connected.
Step 3: Export During Image Generation
- Generate an image in Raspberry AI as usual
- Click on the generated image
- Select Export
- Choose Trasix from the dedicated integrations export section
Each integration has its own export flow, making it easy to manage multiple destinations.

Step 4: Fill in Required Export Details
When exporting to Trasix, you’ll be prompted to provide:
- Status / Type
Examples: Prints & Pattern - Color Code
Examples: Black & White, - Image Set Preview
Preview how the asset will appear in Trasix - Classification Type
Examples: Detail, Model shot
Once complete, click Export.

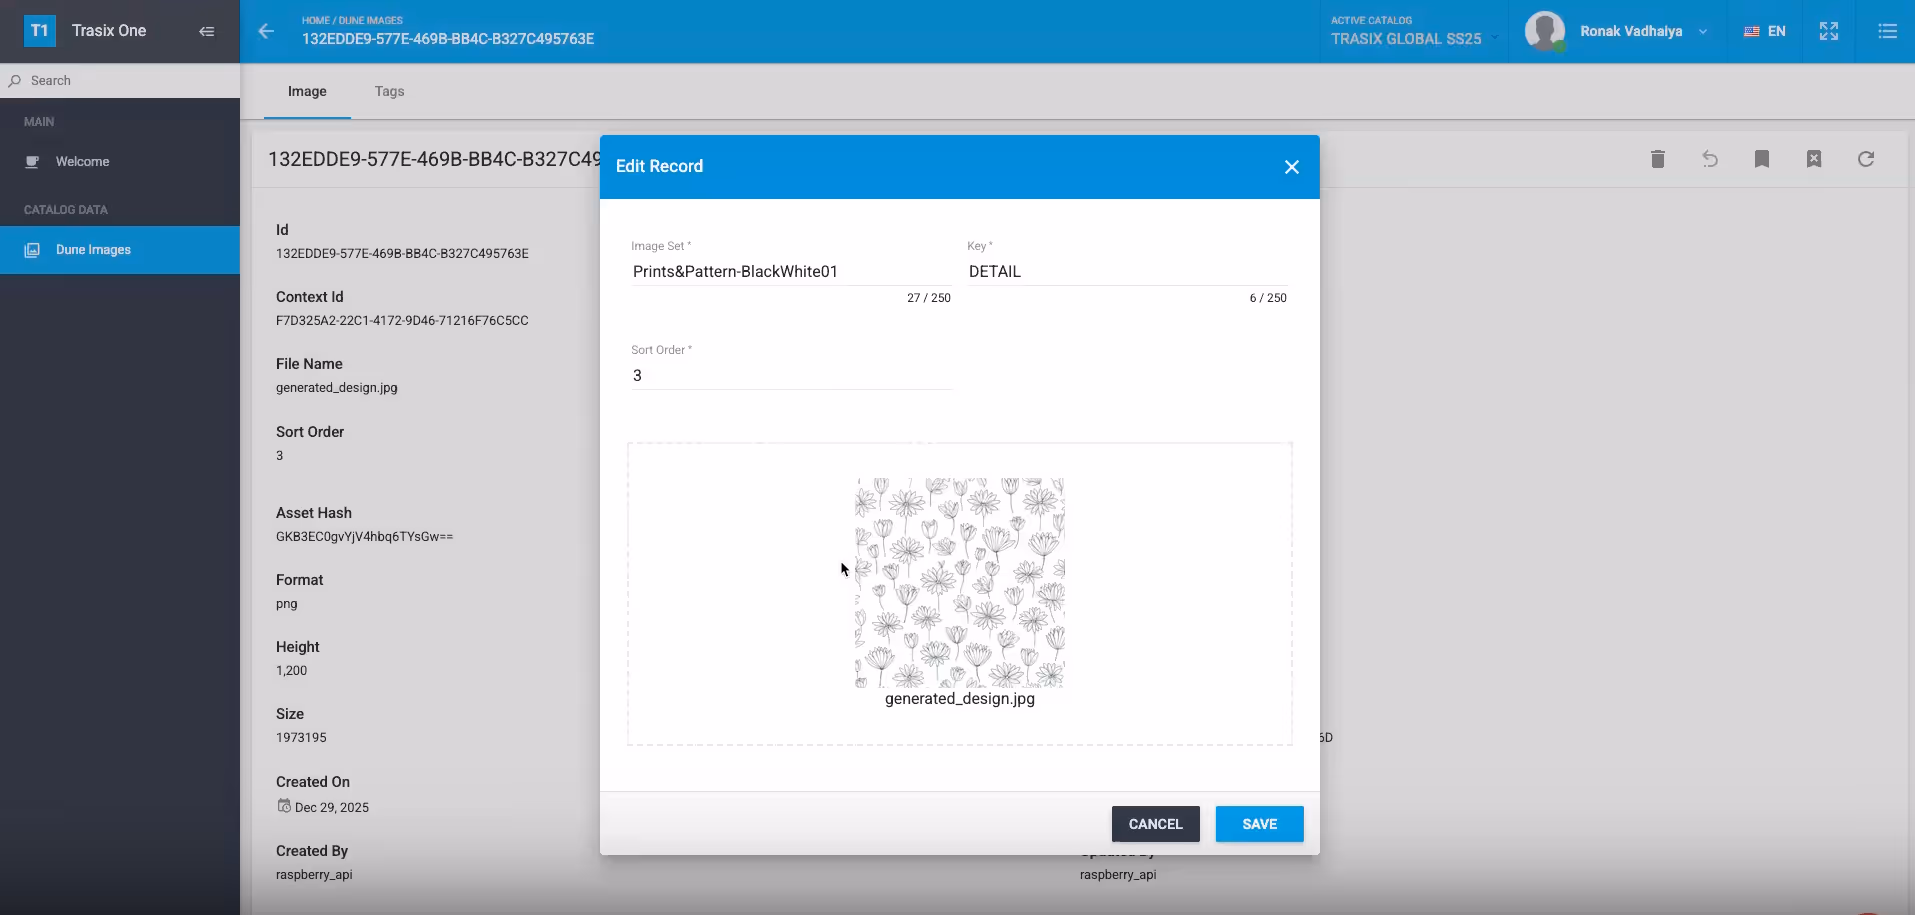
Step 5: Confirm Successful Export
After exporting:
- The image appears on the Trasix tracing board
- The asset is:
- Selectable
- Draggable
- Ready to be incorporated into the board
Step 6: Export from the Library (Alternative Flow)
To export from the Library:
- Go to the Library
- Select an existing image
- Click Export
- Choose Trasix
- Enter:
- Style code
- Color code
- Classification type
- Click Export
The image is sent directly to Trasix.
Why This Matters for Brands
The Raspberry × Trasix integration removes friction between creativity and planning. Designers can move faster, planners get visibility earlier, and teams collaborate from a single, shared source of truth—reducing rework and accelerating decision-making across the product lifecycle.
Heading 1
Heading 2
Heading 3
Heading 4
Heading 5
Heading 6
Lorem ipsum dolor sit amet, consectetur adipiscing elit, sed do eiusmod tempor incididunt ut labore et dolore magna aliqua. Ut enim ad minim veniam, quis nostrud exercitation ullamco laboris nisi ut aliquip ex ea commodo consequat. Duis aute irure dolor in reprehenderit in voluptate velit esse cillum dolore eu fugiat nulla pariatur.
Merchandising and design now create together live in meetings—no more weeks of back and forth.”
[[VP of Merchandising] blog-quote-ttl]
[[$30M alternative eCommerce fashion retailer] blog-quote-subttl]
Quote Name Style
Ordered list
- Item 1
- Item 2
- Item 3
Unordered list
- Item A
- Item B
- Item C
Bold text
Emphasis
Superscript
Subscript
How to Drive AI Transformation Inside Creative Organizations
Learn the four patterns AI-forward design teams use to build real AI fluency from leadership culture and weekly rituals to embedding AI in reviews and closing the feedback loop.

5 Requirements for an Enterprise-Grade Generative AI Design Platform

Create Product Images from Styled Looks with Raspberry AI
Extract clean product images from styled looks in seconds. Off-Body by Raspberry AI auto-detects garments and accessories for faster PDPs and merchandising.
Sign Up for Our Newsletter
We’re constantly enhancing our product. Stay informed with the latest updates.

Ready to Design Smarter, Faster, and at Scale?
Start creating stunning photorealistic designs in just a few clicks.