
Visualize Your Product Displays | Raspberry AI
Traditional mockups and store set visuals can take days (or weeks) to coordinate, revise, and finalize.
With Raspberry AI’s Edit Module, you can turn planograms, display diagrams, and layout mockups into photorealistic, retail-ready product displays—quickly. This workflow helps teams generate clear, premium visuals for faster alignment, smoother presentations, and more confident merchandising decisions.
Why Visualizing Product Displays Early Matters
When you can see the shelf, table, or wall display before it hits the floor, you can:
- Validate layout, spacing, and product count early
- Reduce back-and-forth across teams
- Improve merchandising alignment and stakeholder approvals
- Create polished visuals for line reviews, buyer presentations, and internal decks
- Iterate quickly across seasonal swaps and assortment changes
If you're building retail displays, you shouldn’t have to wait until the store set is physically installed to know if it works.
.png)
Who This Workflow Is For
This approach is especially useful for cross-functional retail and product teams:
- Merchandising & Retail Planning — review assortments, spacing, and product count visually
- Visual Merchandising (VM) — test fixture material direction and layout realism
- Brand & Marketing — create polished mockups for internal presentations
- Sales / Buyer Presentations — generate high-quality visuals for line reviews and sell-in
- Product Teams — align earlier with fewer manual mockups and faster iteration
How to Create a Product Display Using Raspberry AI
Below is a simple, repeatable workflow for creating photoreal product displays in the Edit Module.
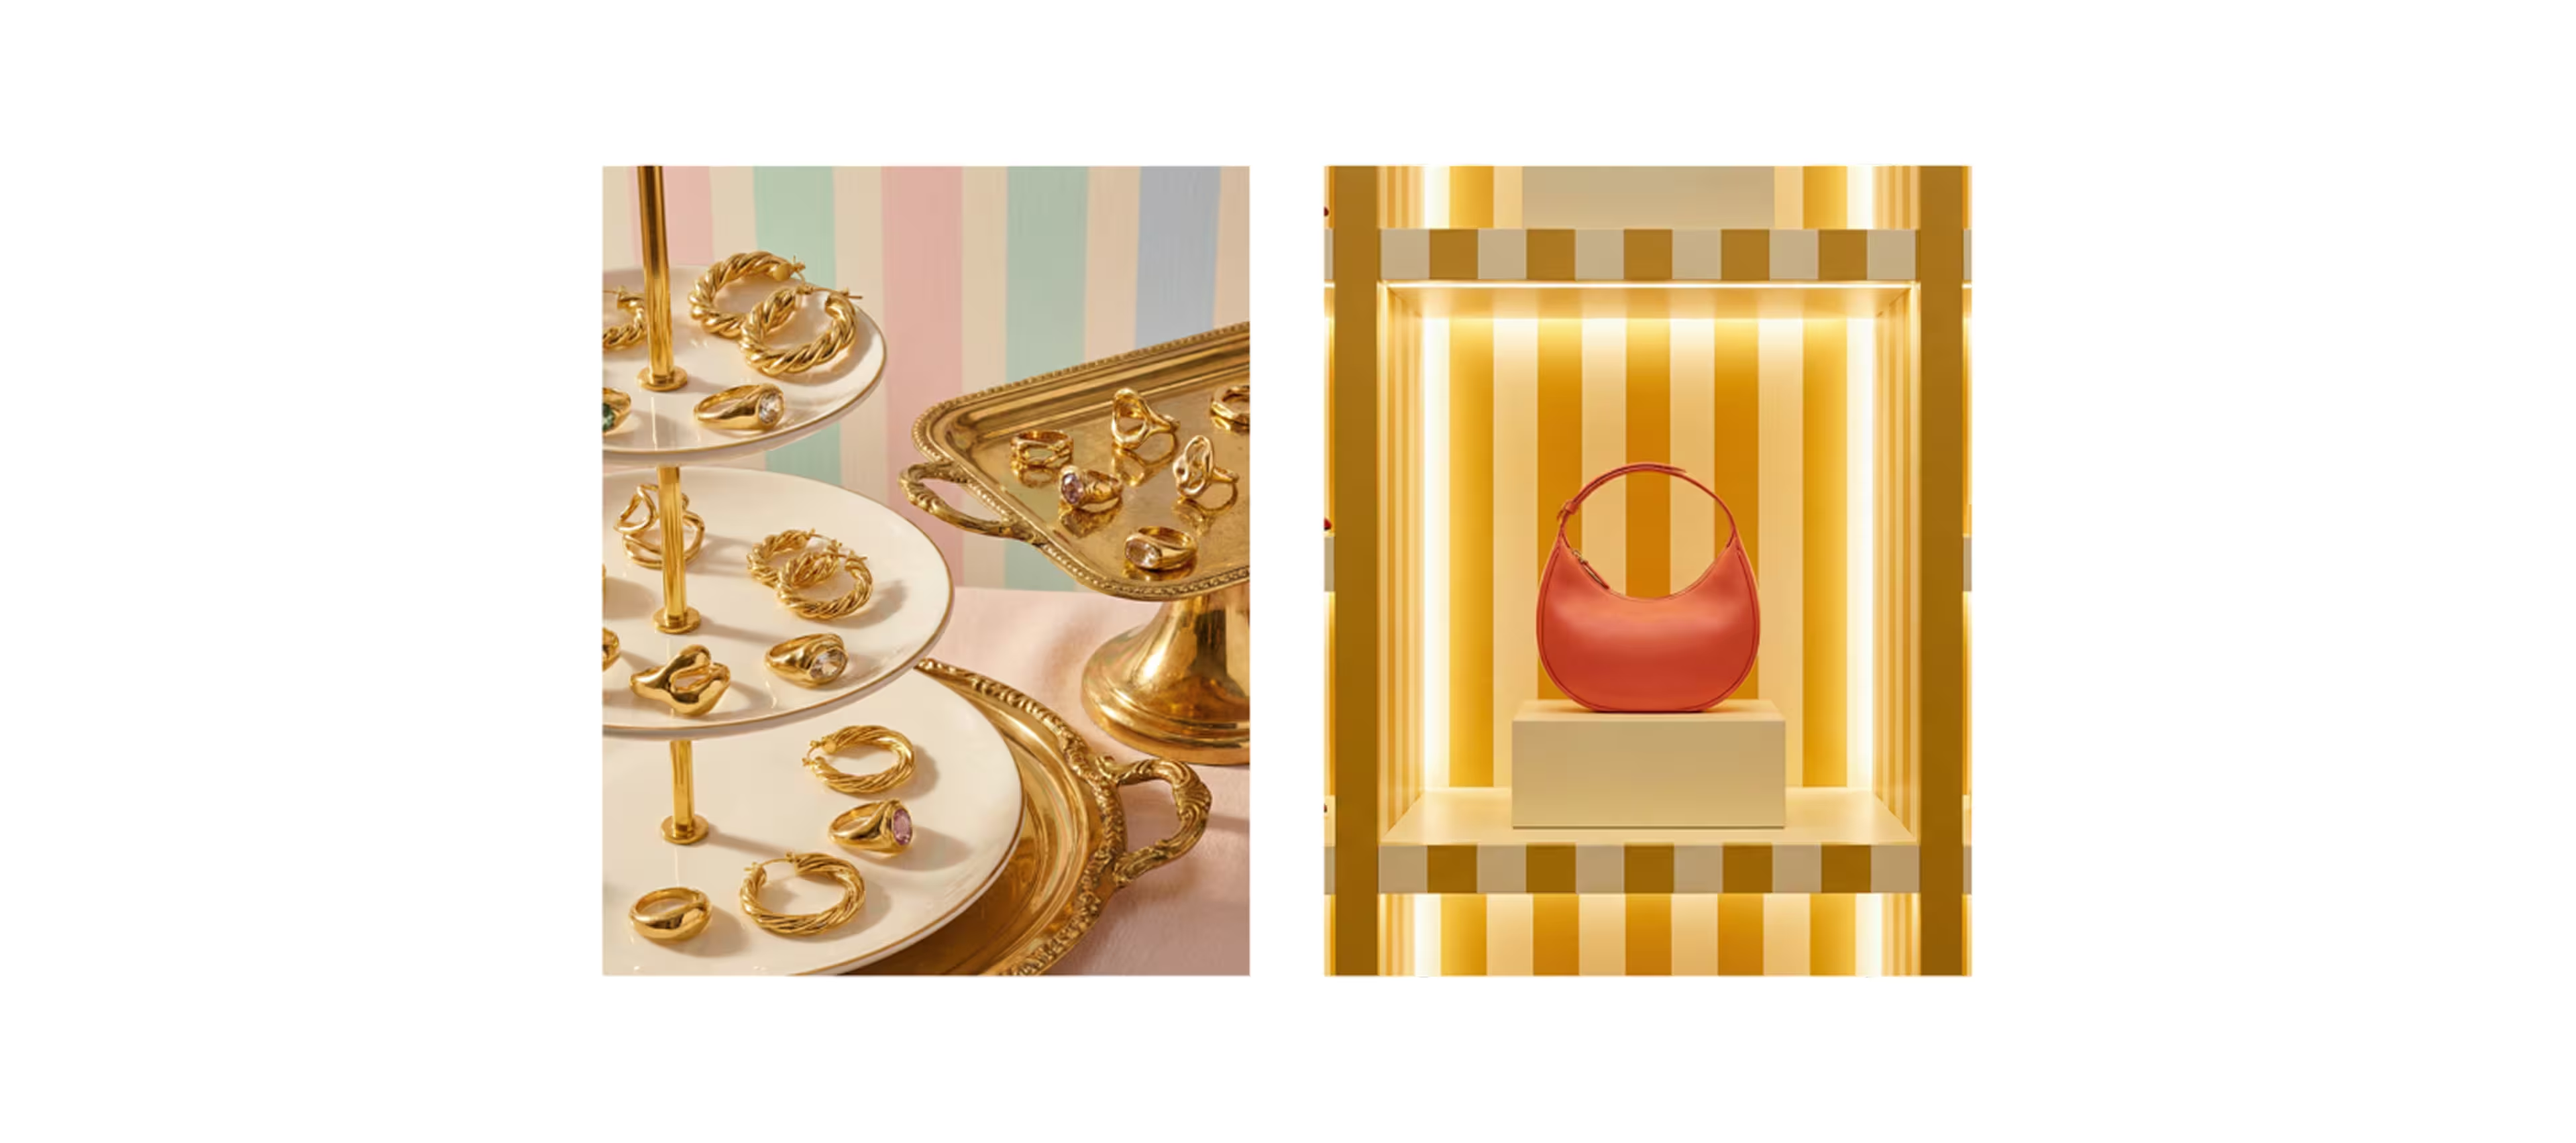
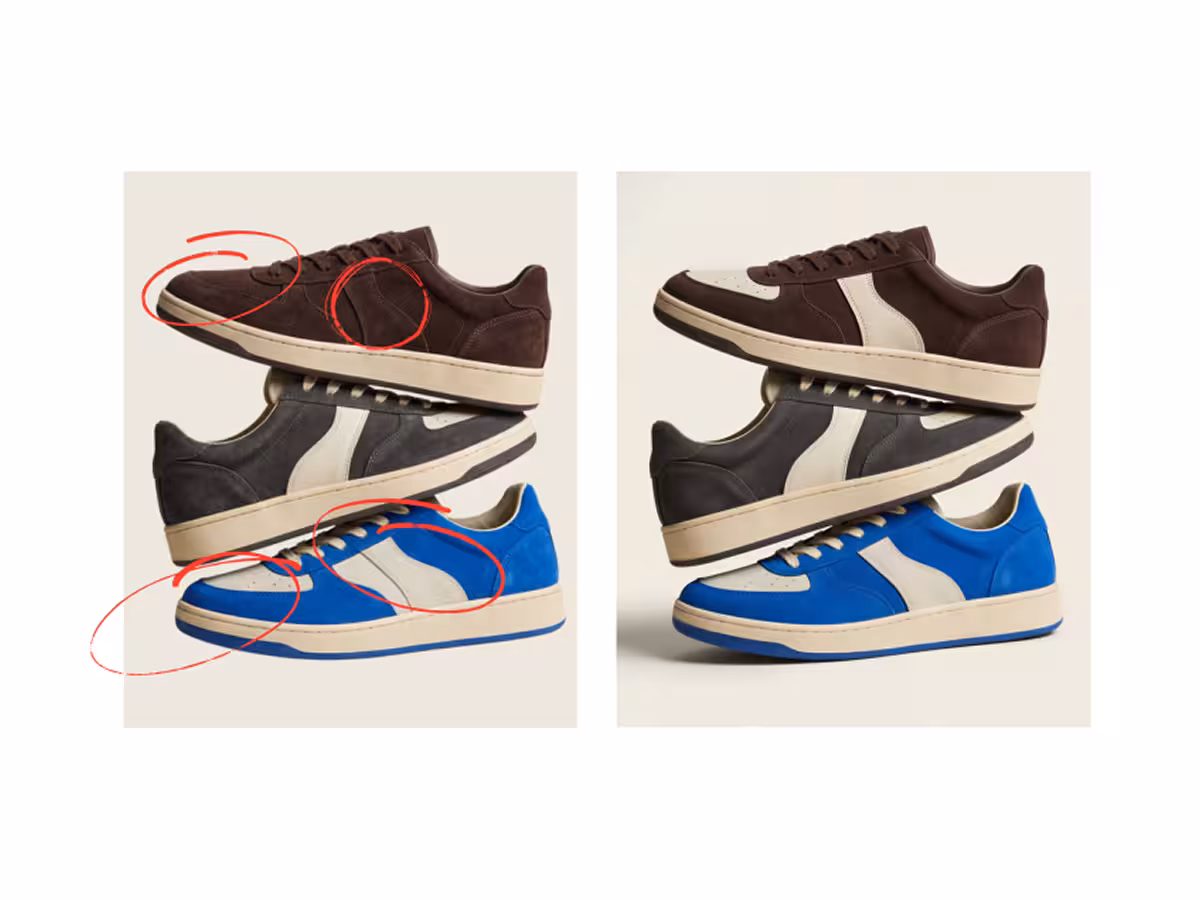
1) Dress a Blank Display (Build Your Reusable Base)
Start with a blank display template—fixtures, shelving, props, and stands included (e.g., earring stands, display risers, tables, wall bays).
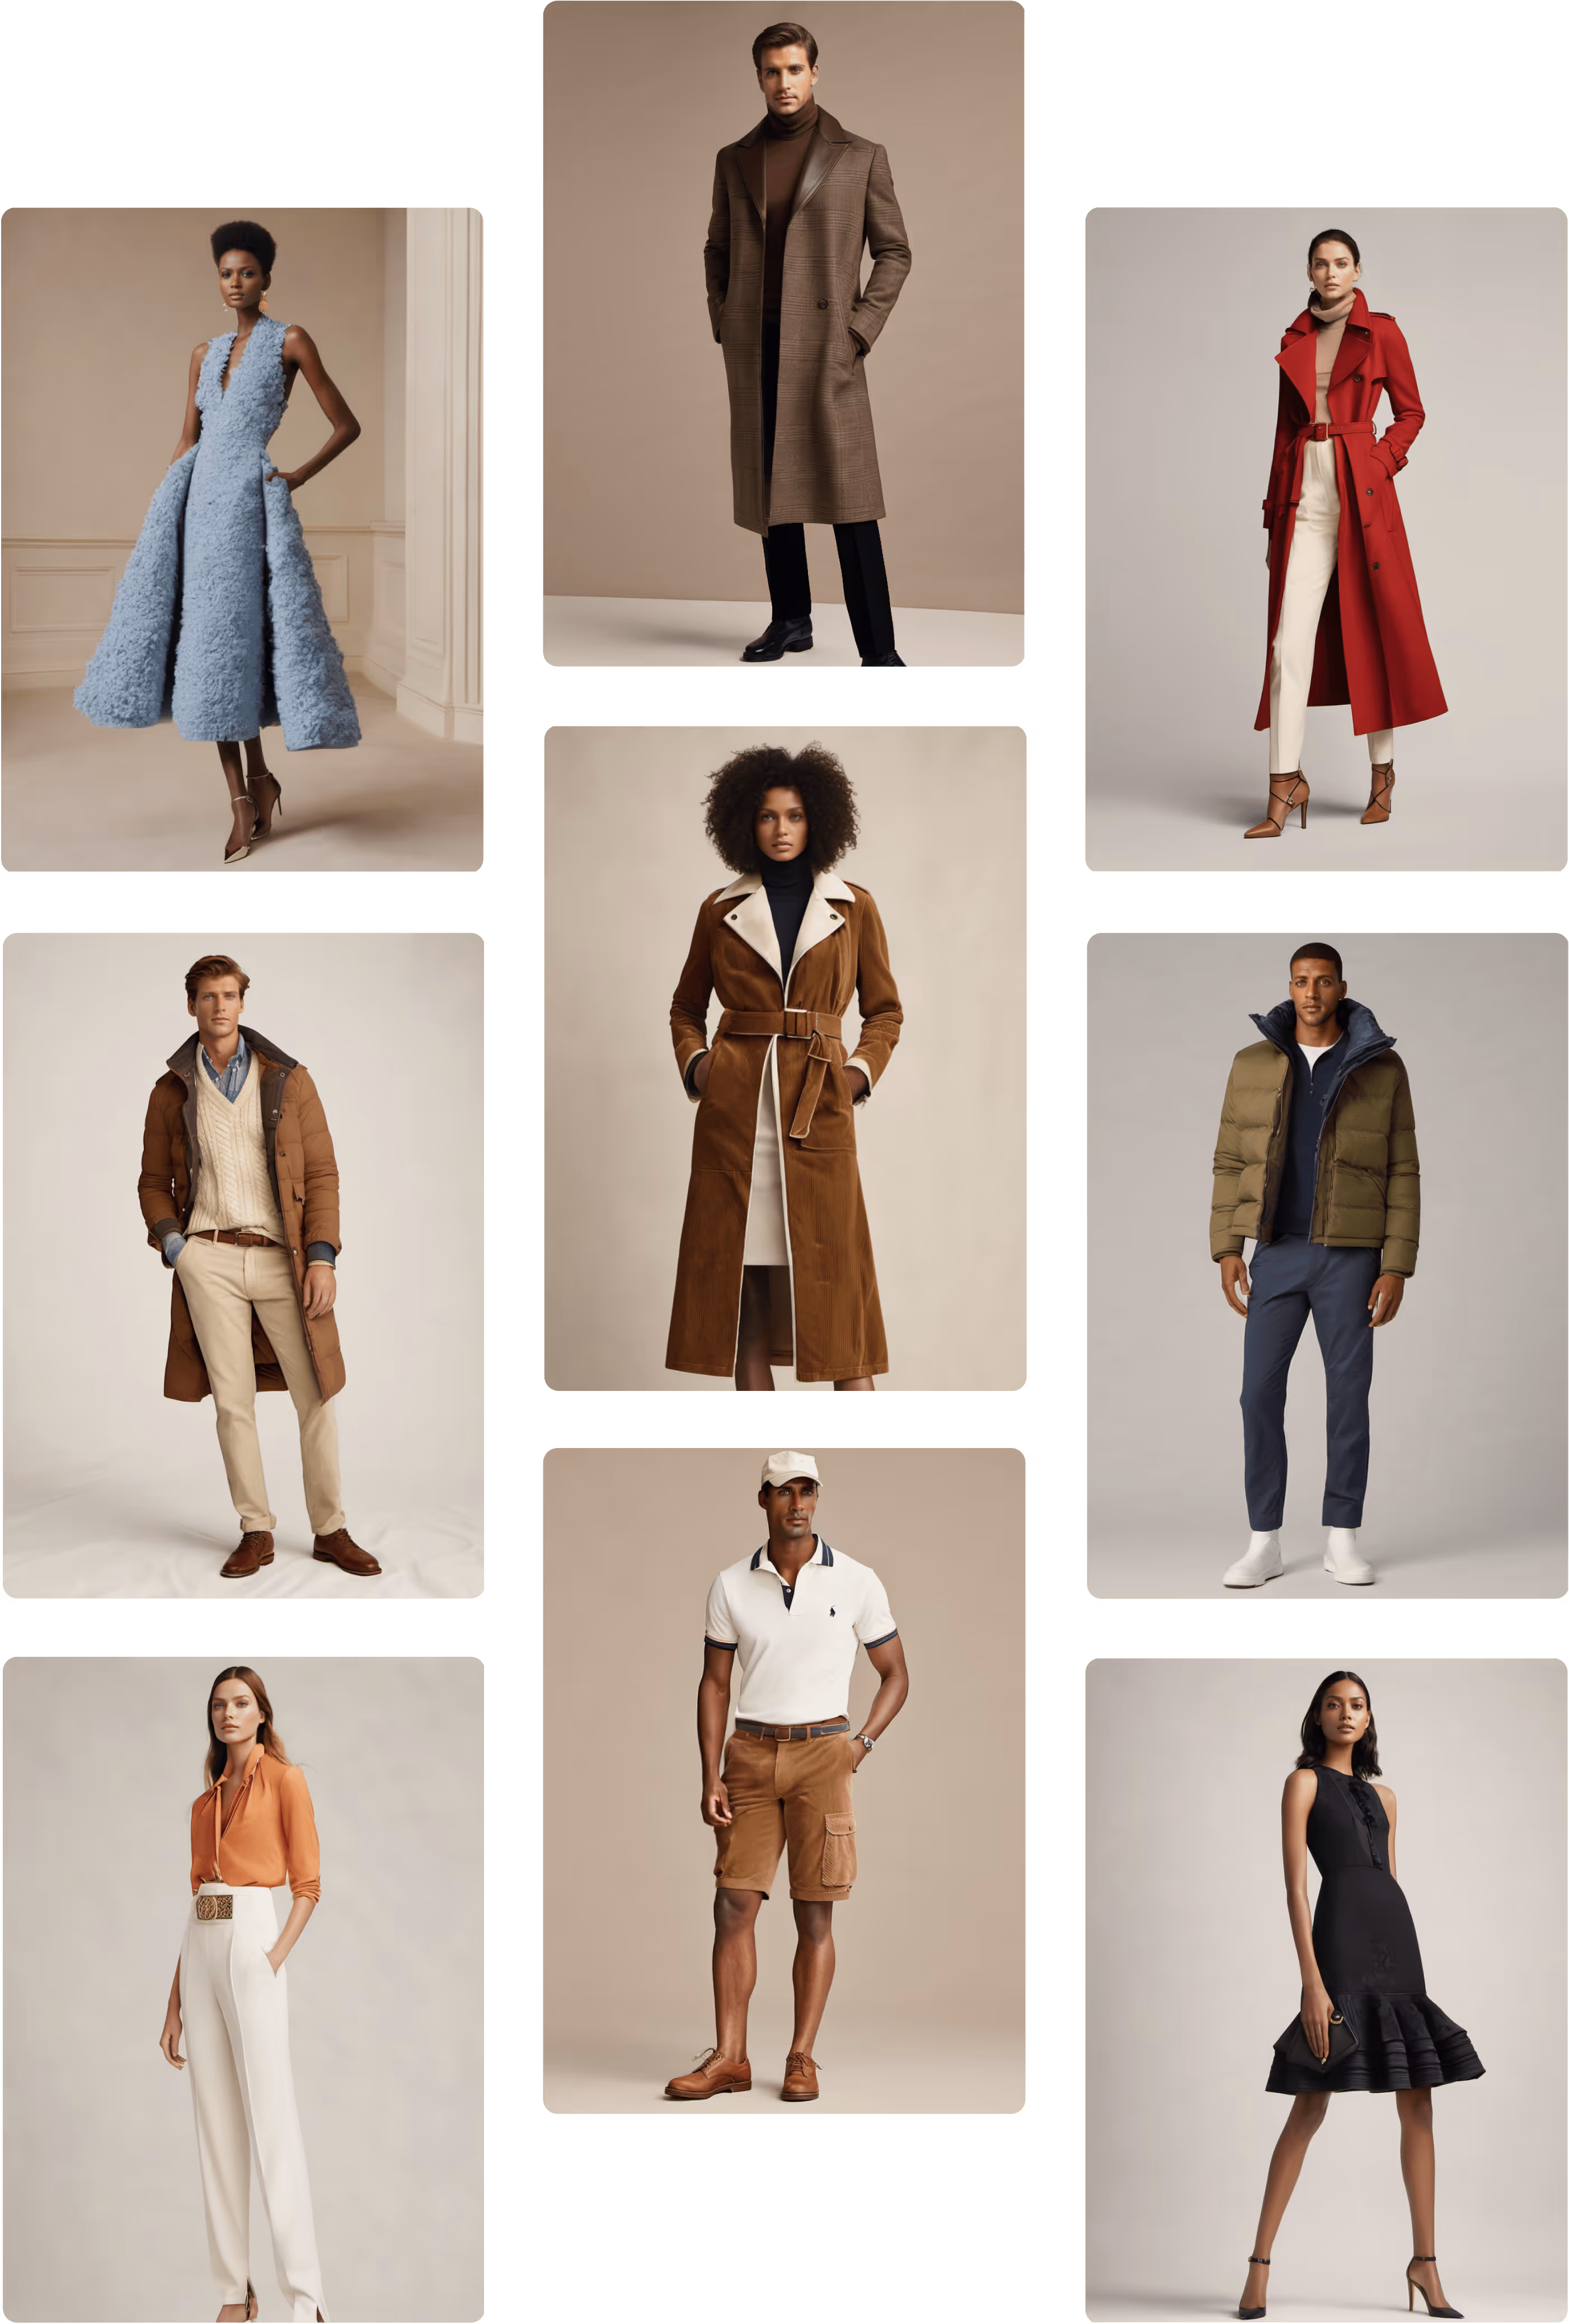
Then, use your Raspberry library to “dress” the display with product imagery your team has already created. This makes it easy to swap products in and out for:
- Seasonal refreshes
- Assortment changes
- Colorway updates
- New capsule launches
.png)
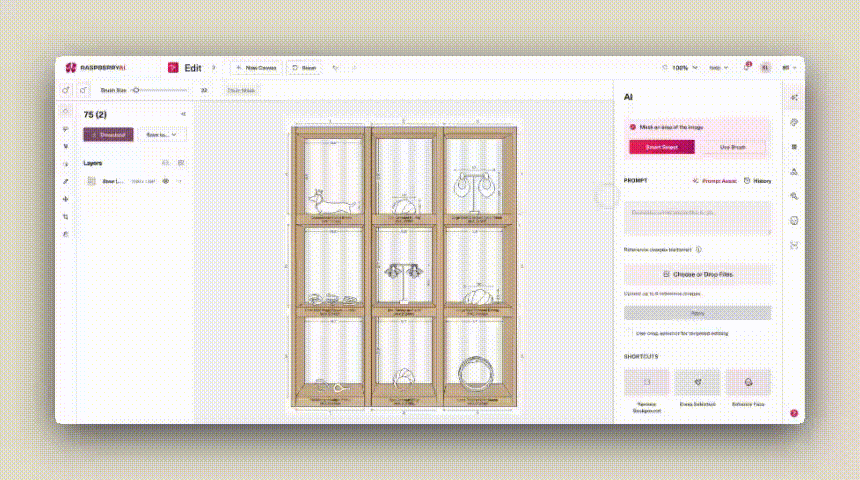
2) Upload Your Planogram or Display Diagram
Drop your planogram, layout diagram, or merchandising mockup into the Edit Module.
%20(1).png)
This can include:
- Shelf layouts
- Table displays
- Wall bays
- Pegboard configurations
- Flat display diagrams
- Store set mockups
The more clearly your layout shows spacing and product count, the easier it is to translate into a realistic display.
3) Add a Prompt (Copy/Paste Starter Prompt)
%20(1).png)
Use a prompt that prioritizes accuracy and realism. Here’s a short version that consistently performs well:
Starter Product Display Prompt
Create a photorealistic retail display based on the provided display diagram. Translate the layout, spacing, and product count accurately while preserving the product designs, proportions, and packaging details.
Get more tips and tricks for prompting for product displays here.
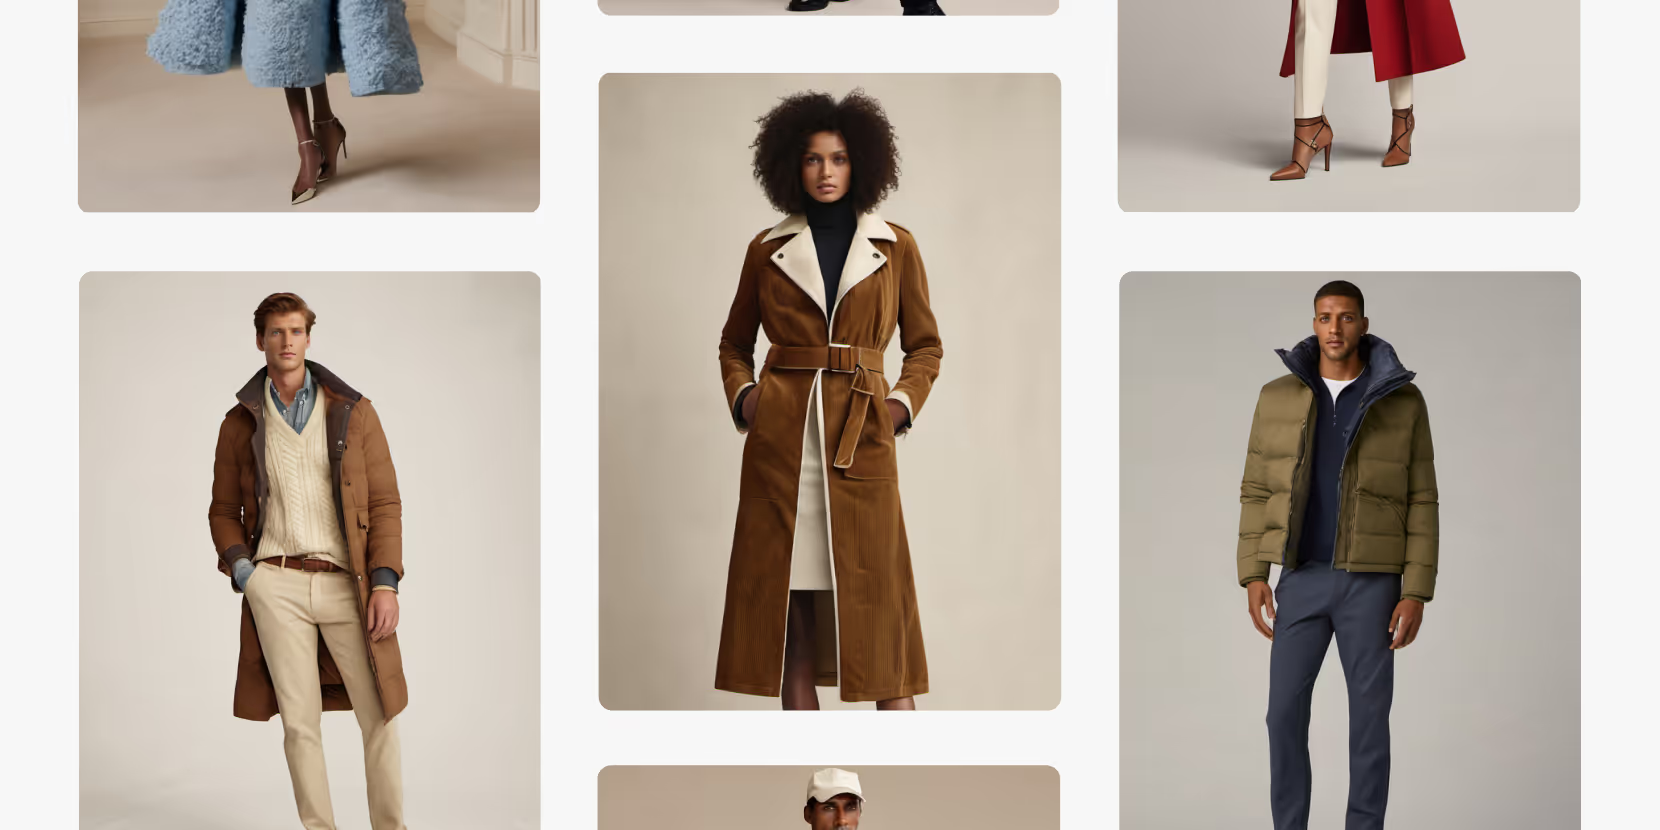
4) Generate + Iterate
.png)
Click Generate and review your first output. Then refine with quick iterations by adjusting:
- Fixture materials (wood, acrylic, metal, matte/gloss)
- Lighting (neutral studio vs. retail lighting)
- Product spacing and alignment
- Color accuracy
- Packaging realism and proportion
A few targeted prompt tweaks can take you from “good” to “presentation-ready.”
Tips & Tricks for Better Product Display Prompting
If you want consistently clean, realistic results, these prompt improvements help a lot:
✅ If your output doesn’t match the layout
Add: “Translate layout, spacing, and product count accurately.”
✅ If it’s changing the products
Add: “Preserve exact product designs, proportions, and packaging details.”
✅ If it looks too stylized or abstract
Add: “No stylization—prioritize realism, clarity, and accuracy.”
✅ If the image feels flat or dull
Add: “Use professional studio lighting with clear depth, shadows, and form definition.”
✅ If you need tighter color consistency
Add: “Match all colors exactly with no reinterpretation.”
Best Practices: What Makes a Great Photoreal Retail Display Visual?
When your goal is a display image that feels retail-ready, aim for:
- High-resolution clarity (sharp focus, clean edges)
- Natural scale and perspective (feels tangible and “in-store”)
- Even stocking and spacing (looks fully merchandised)
- Realistic materials (fixtures + packaging finishes are believable)
- Professional lighting (depth, shadow, separation between products)
This is the difference between “a mockup” and “a visual stakeholders can approve.”
Start Visualizing Displays Faster (and Smarter)
If your team is still relying on manual mockups, late-stage store photos, or time-consuming deck builds, this workflow is a fast upgrade.
With Raspberry AI, you can create photorealistic retail displays directly from planograms and diagrams—then refine, swap products, and iterate as often as needed.
Visualize your product displays before they hit the floor—and walk into store set decisions with confidence.
Heading 1
Heading 2
Heading 3
Heading 4
Heading 5
Heading 6
Lorem ipsum dolor sit amet, consectetur adipiscing elit, sed do eiusmod tempor incididunt ut labore et dolore magna aliqua. Ut enim ad minim veniam, quis nostrud exercitation ullamco laboris nisi ut aliquip ex ea commodo consequat. Duis aute irure dolor in reprehenderit in voluptate velit esse cillum dolore eu fugiat nulla pariatur.
Merchandising and design now create together live in meetings—no more weeks of back and forth.”
[[VP of Merchandising] blog-quote-ttl]
[[$30M alternative eCommerce fashion retailer] blog-quote-subttl]
Quote Name Style
Ordered list
- Item 1
- Item 2
- Item 3
Unordered list
- Item A
- Item B
- Item C
Bold text
Emphasis
Superscript
Subscript
Stop Doing This: The 7 Most Common Prompting Mistakes in Raspberry AI
Avoid the 7 most common prompting mistakes in Raspberry AI—overstuffed prompts, vague language, missing details, and more—with fixes and examples.
3 Batch Workflows for Fashion Design: Faster Prints, Graphics, and Colorways
Discover Raspberry AI Batch Workflows for fashion design—batch apply prints, graphics, and colorways in one click to explore more options faster.

Why Raspberry AI is the Only Creative AI on the CB Insights 2026 AI 100
CB Insights evaluated more than 40,000 AI companies worldwide. 100 made the cut. Raspberry AI is the only one built for creative teams — and the data behind the selection tells a clear story about where fashion AI is headed.
Sign Up for Our Newsletter
We’re constantly enhancing our product. Stay informed with the latest updates.

Ready to Design Smarter, Faster, and at Scale?
Start creating stunning photorealistic designs in just a few clicks.