


Overview
The Edit Tool lets you swap specific garments, accessories, and display items in a visual merchandising image using reference photos and targeted prompts — without touching anything else in the scene.
What is visual merchandising in the Edit Tool?
Visual merchandising edits in Raspberry work by pointing the AI at exactly what you want to replace, then showing it what to put there instead. The key is precision: you use Visual Pin Drops to mark each item on the canvas, bring in reference images of the replacement garments, and write a prompt that maps each pin to a reference. The result is a clean, realistic swap — as many items as you need, all in one generation.
Key concepts
The Edit Tool layout
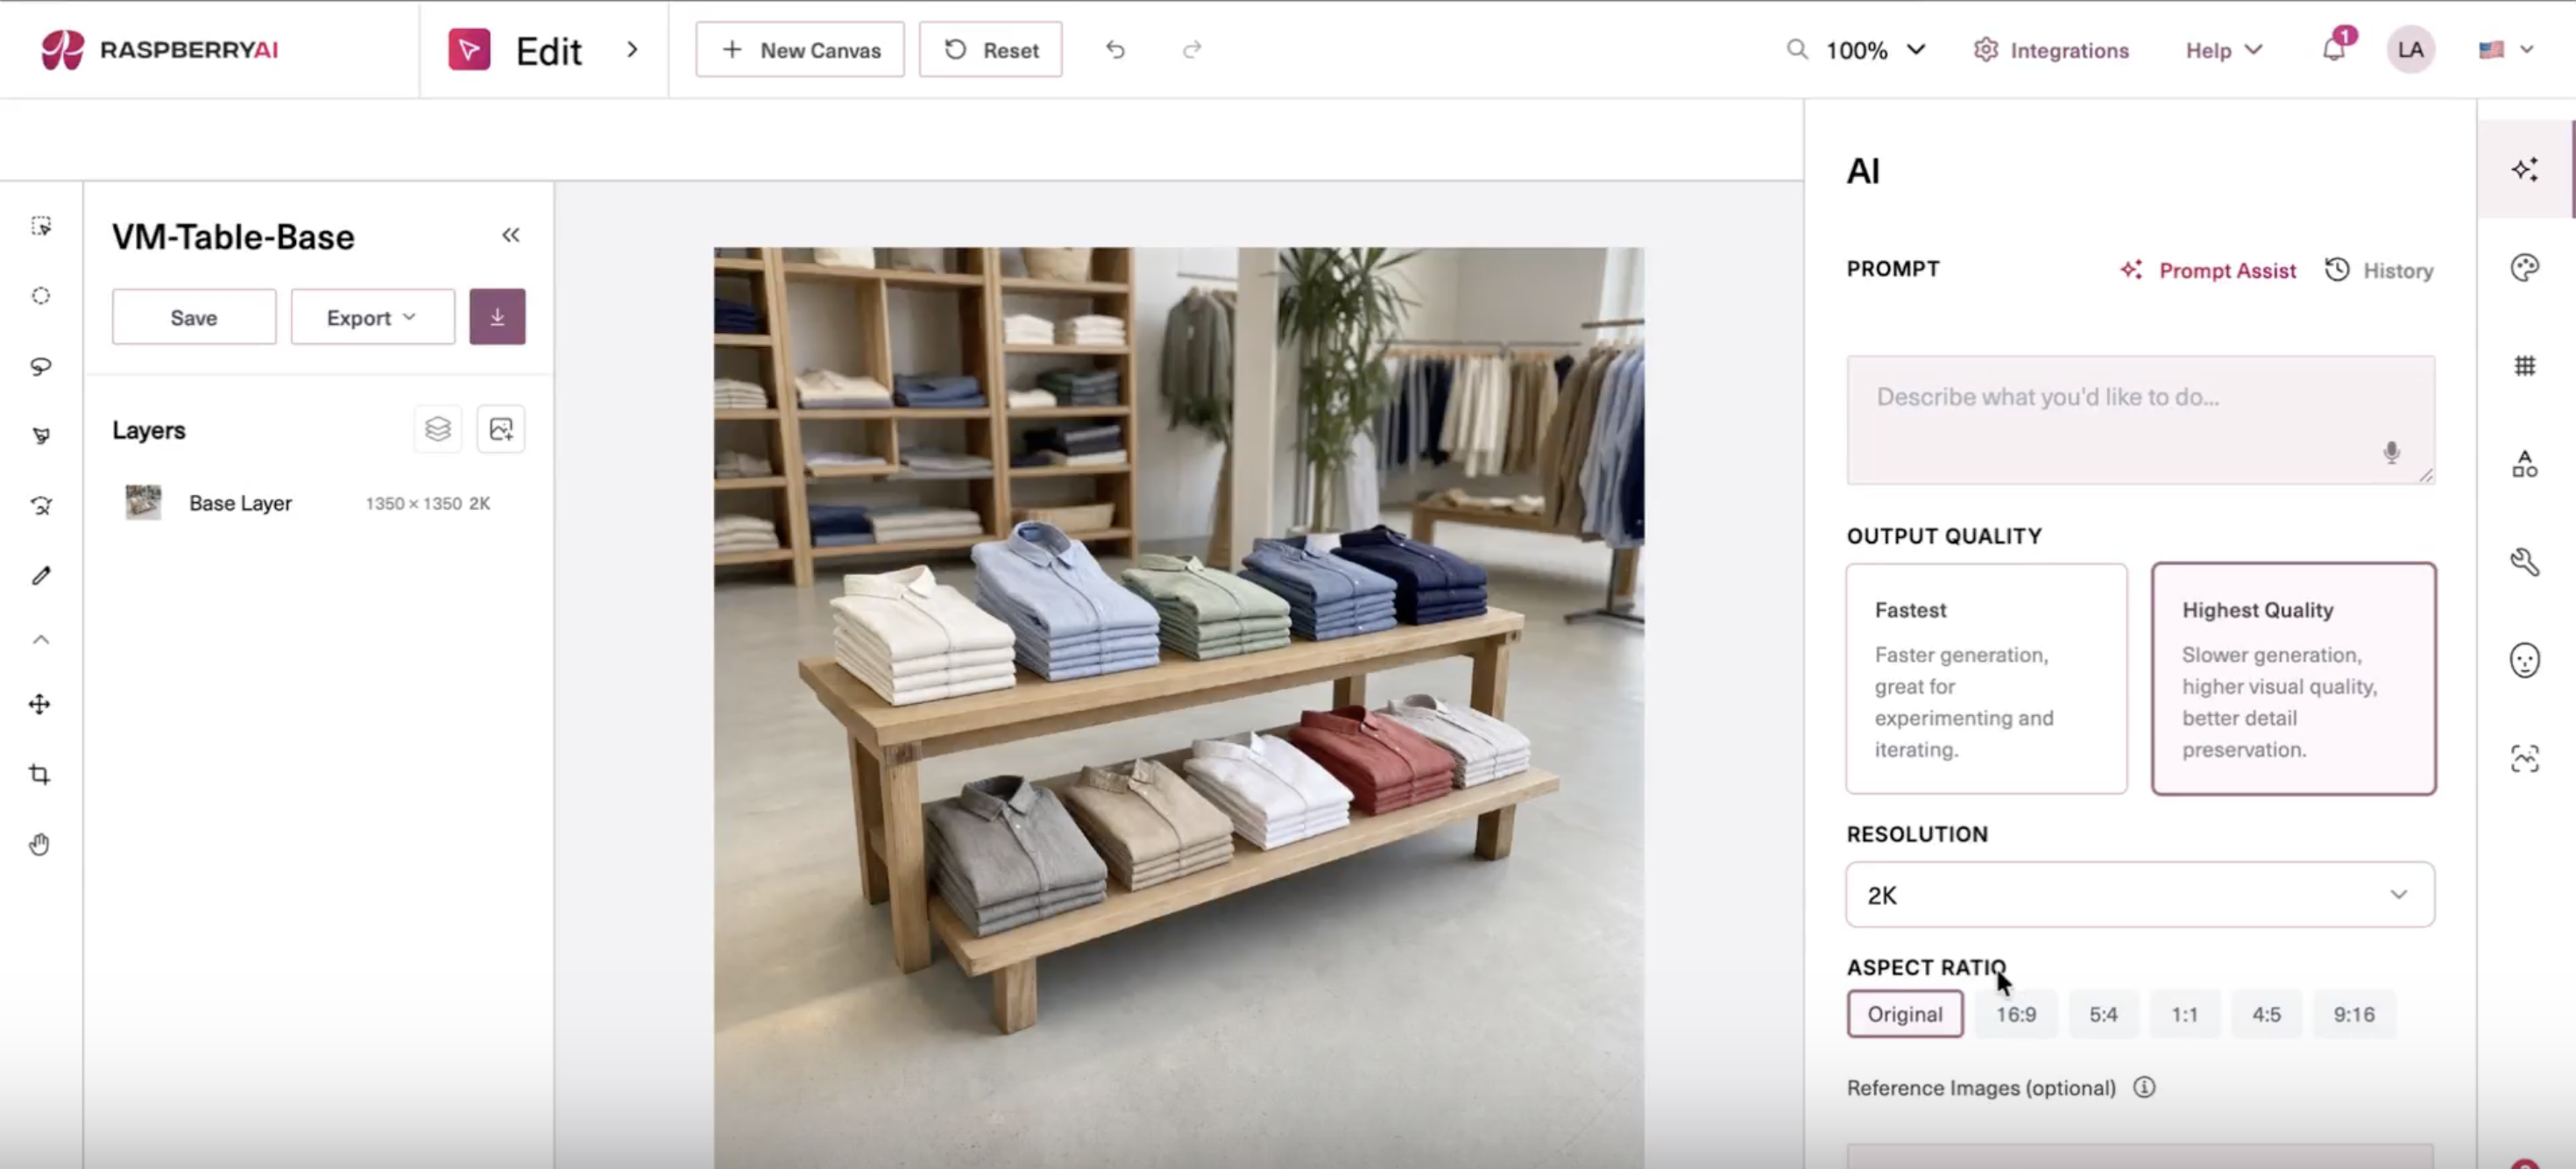
Getting Started
✦ Open your image in the Edit Tool
From any asset in Raspberry, click the asset to open it, then select Open in Editor. This loads the image onto the Edit Tool artboard.
✦ Place Visual Pin Drops
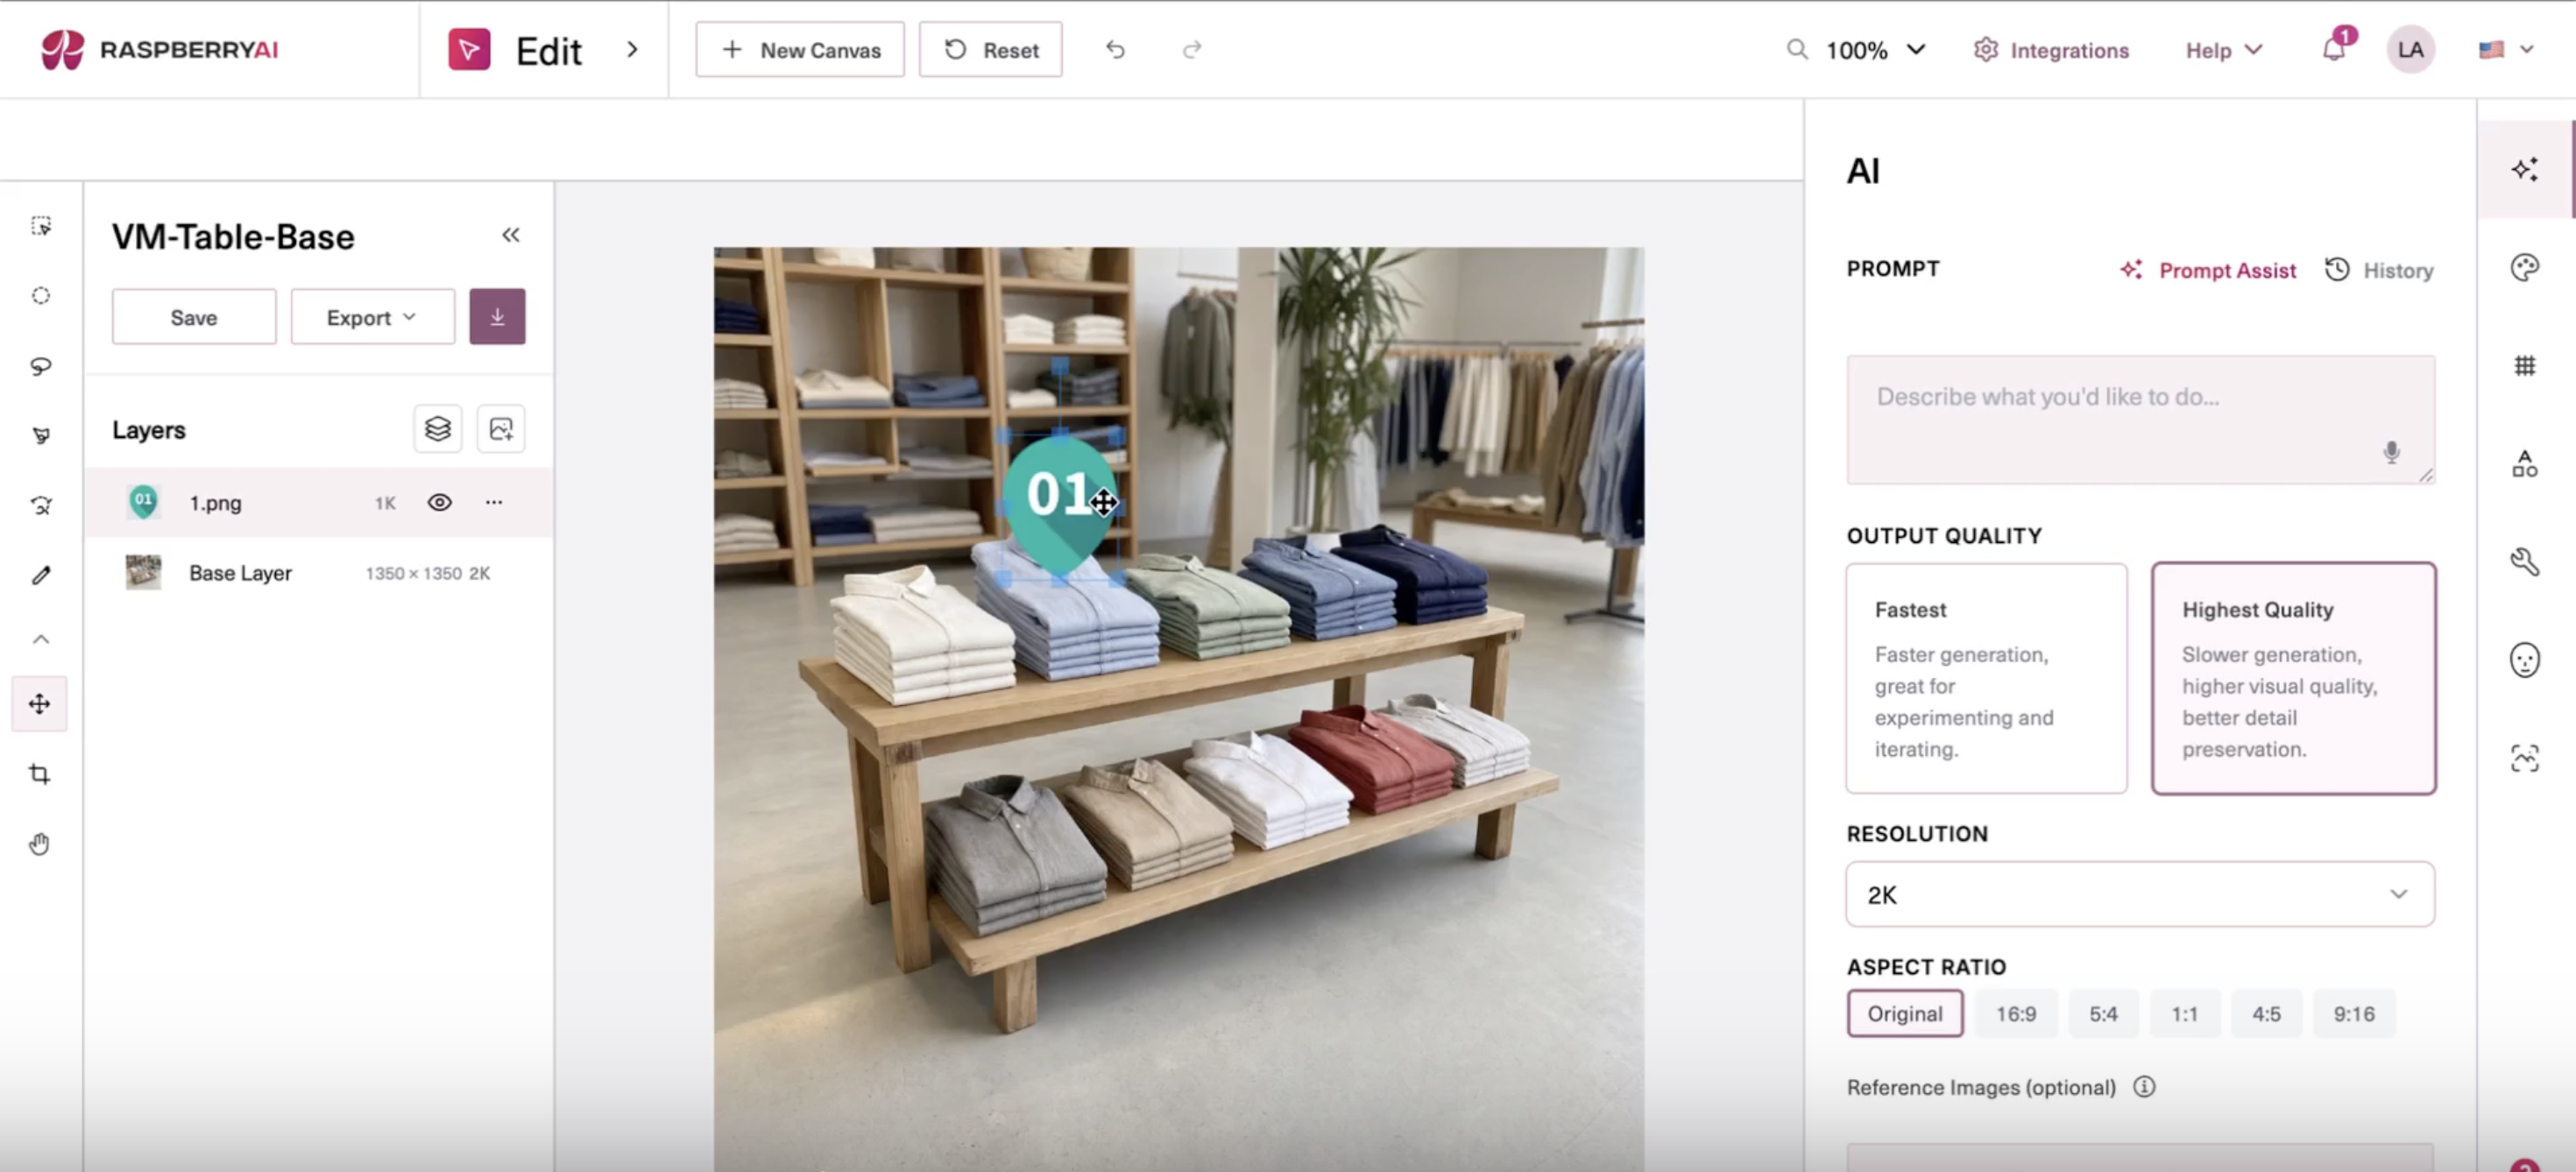
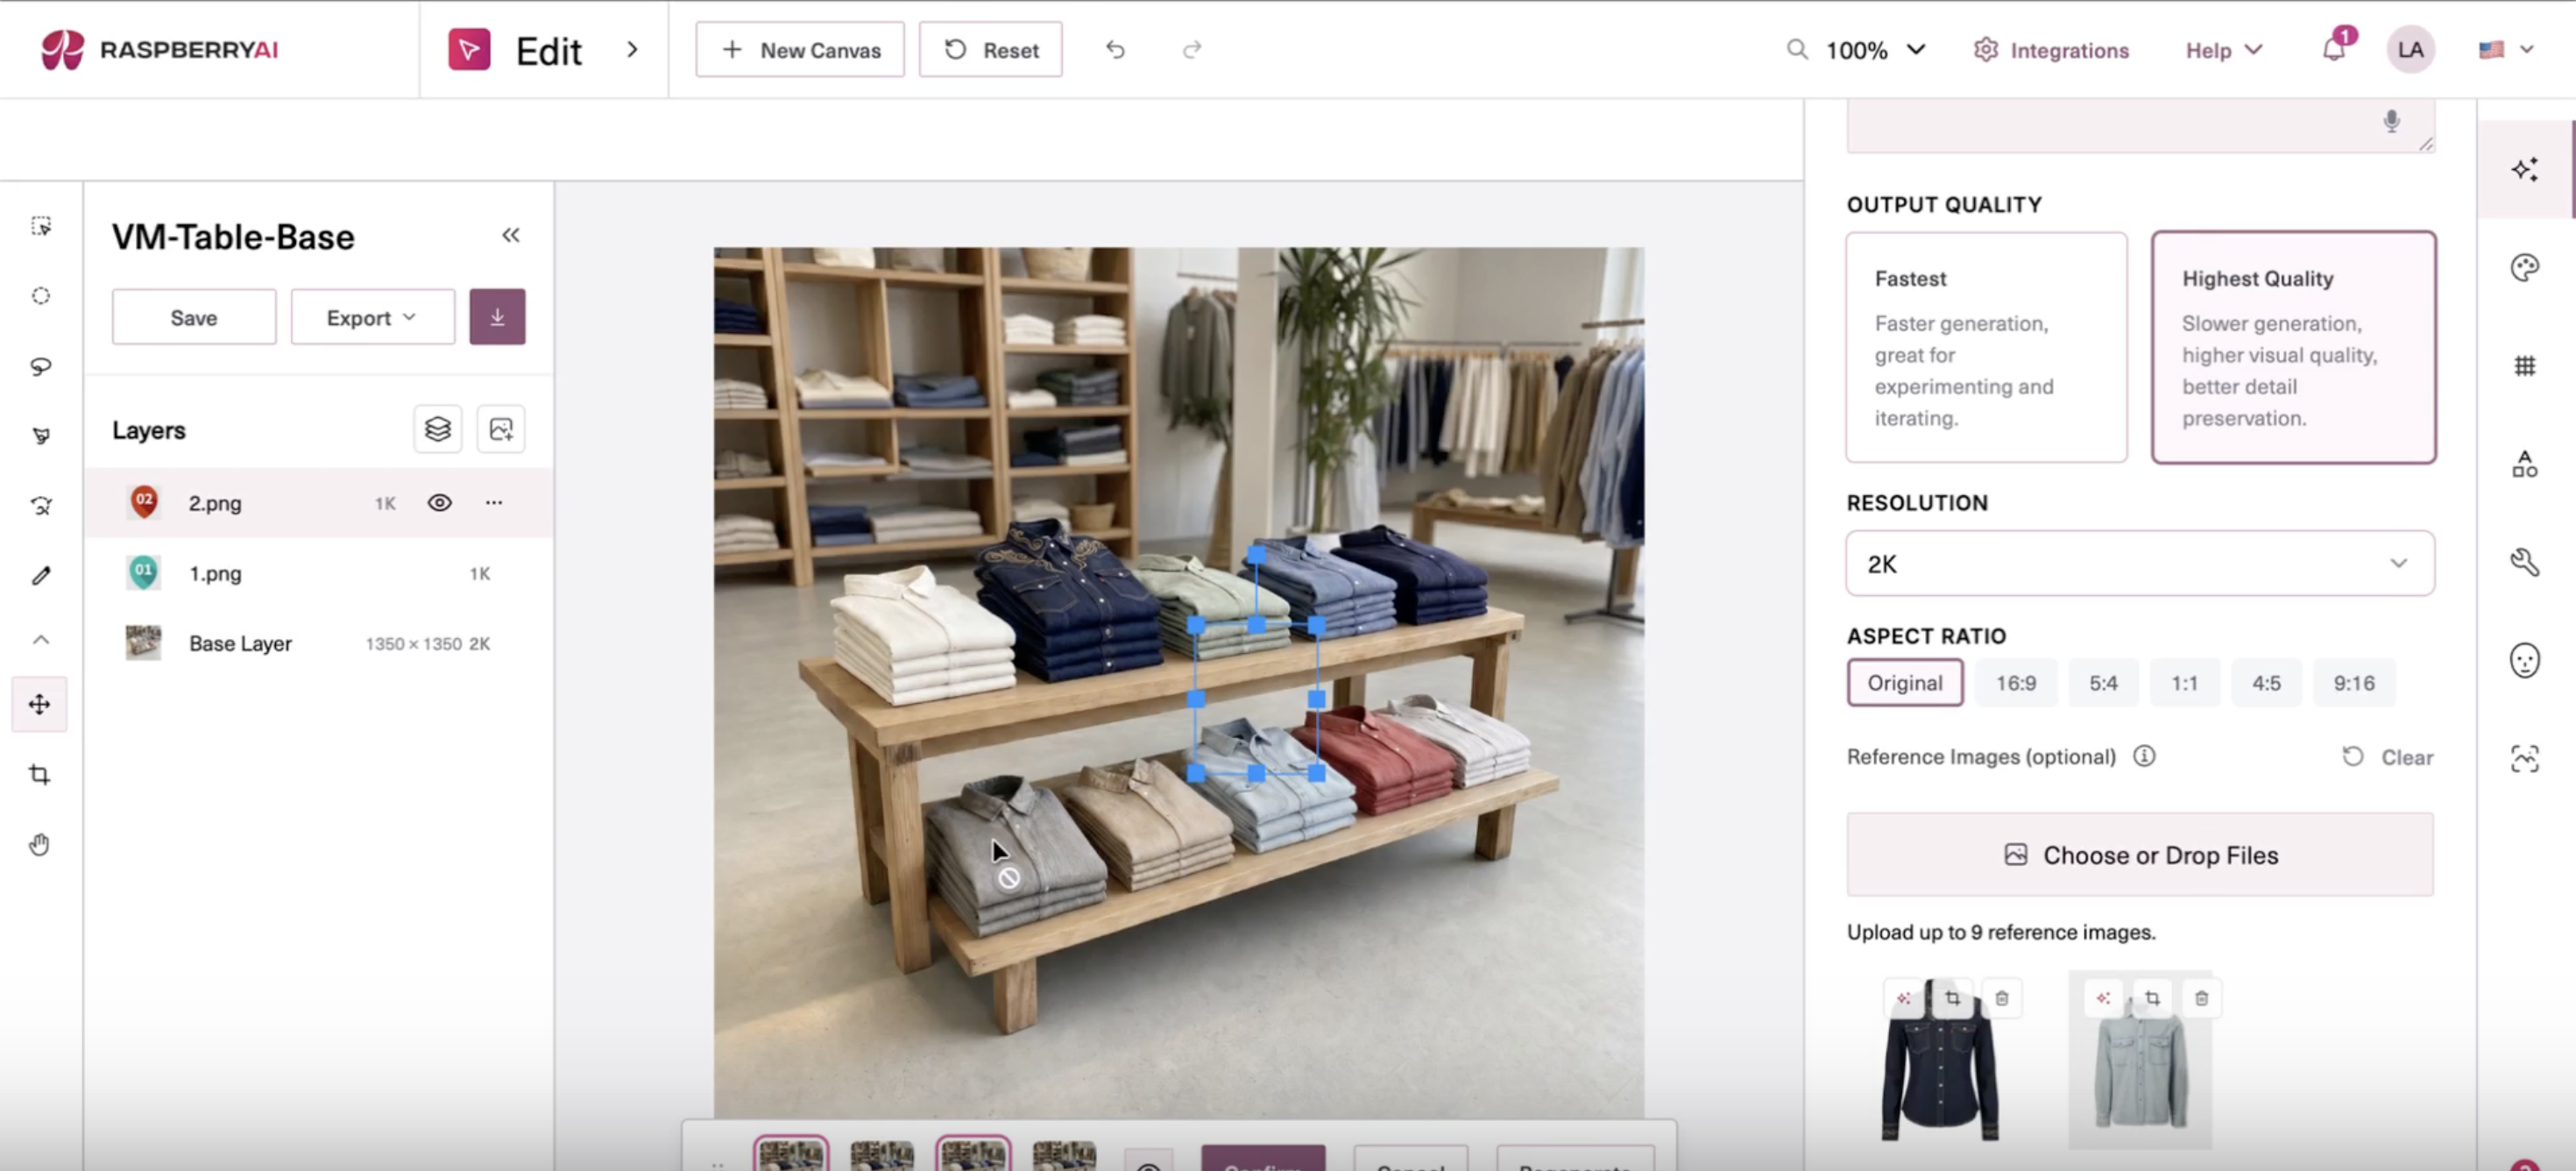
✦ Add your reference images
✦ Write and apply your prompt
Structure your prompt as a list of replacements, one per pin drop:Replace the current [item] under the [color] pin marker with the [description] from reference image [N].
Remove the pin markers afterwards. Keep everything else the same.Then click Apply to run the generation.Example prompt — folded table display:
Replace the current pile under the teal pin marker with the shirt from reference image 1, in the same folded style.
Replace the current pile under the red pin marker with the shirt from reference image 2.
Remove the pin markers afterwards. Keep everything else the same.Example prompt — hanging display:Replace the garment under the teal pin drop with the sweater in reference image 1.
Replace the current garment under the red pin drop with the sweater in reference image 2.
Replace the current garment under the green pin drop with the shirt from reference image 3.
Remove the pin drops afterwards.
✦ Confirm your results
After generation, review all outputs in the results panel. You can confirm multiple favorites at once — they're each added as separate layers. Use the Layers panel to toggle back to the original if you want to compare or iterate.
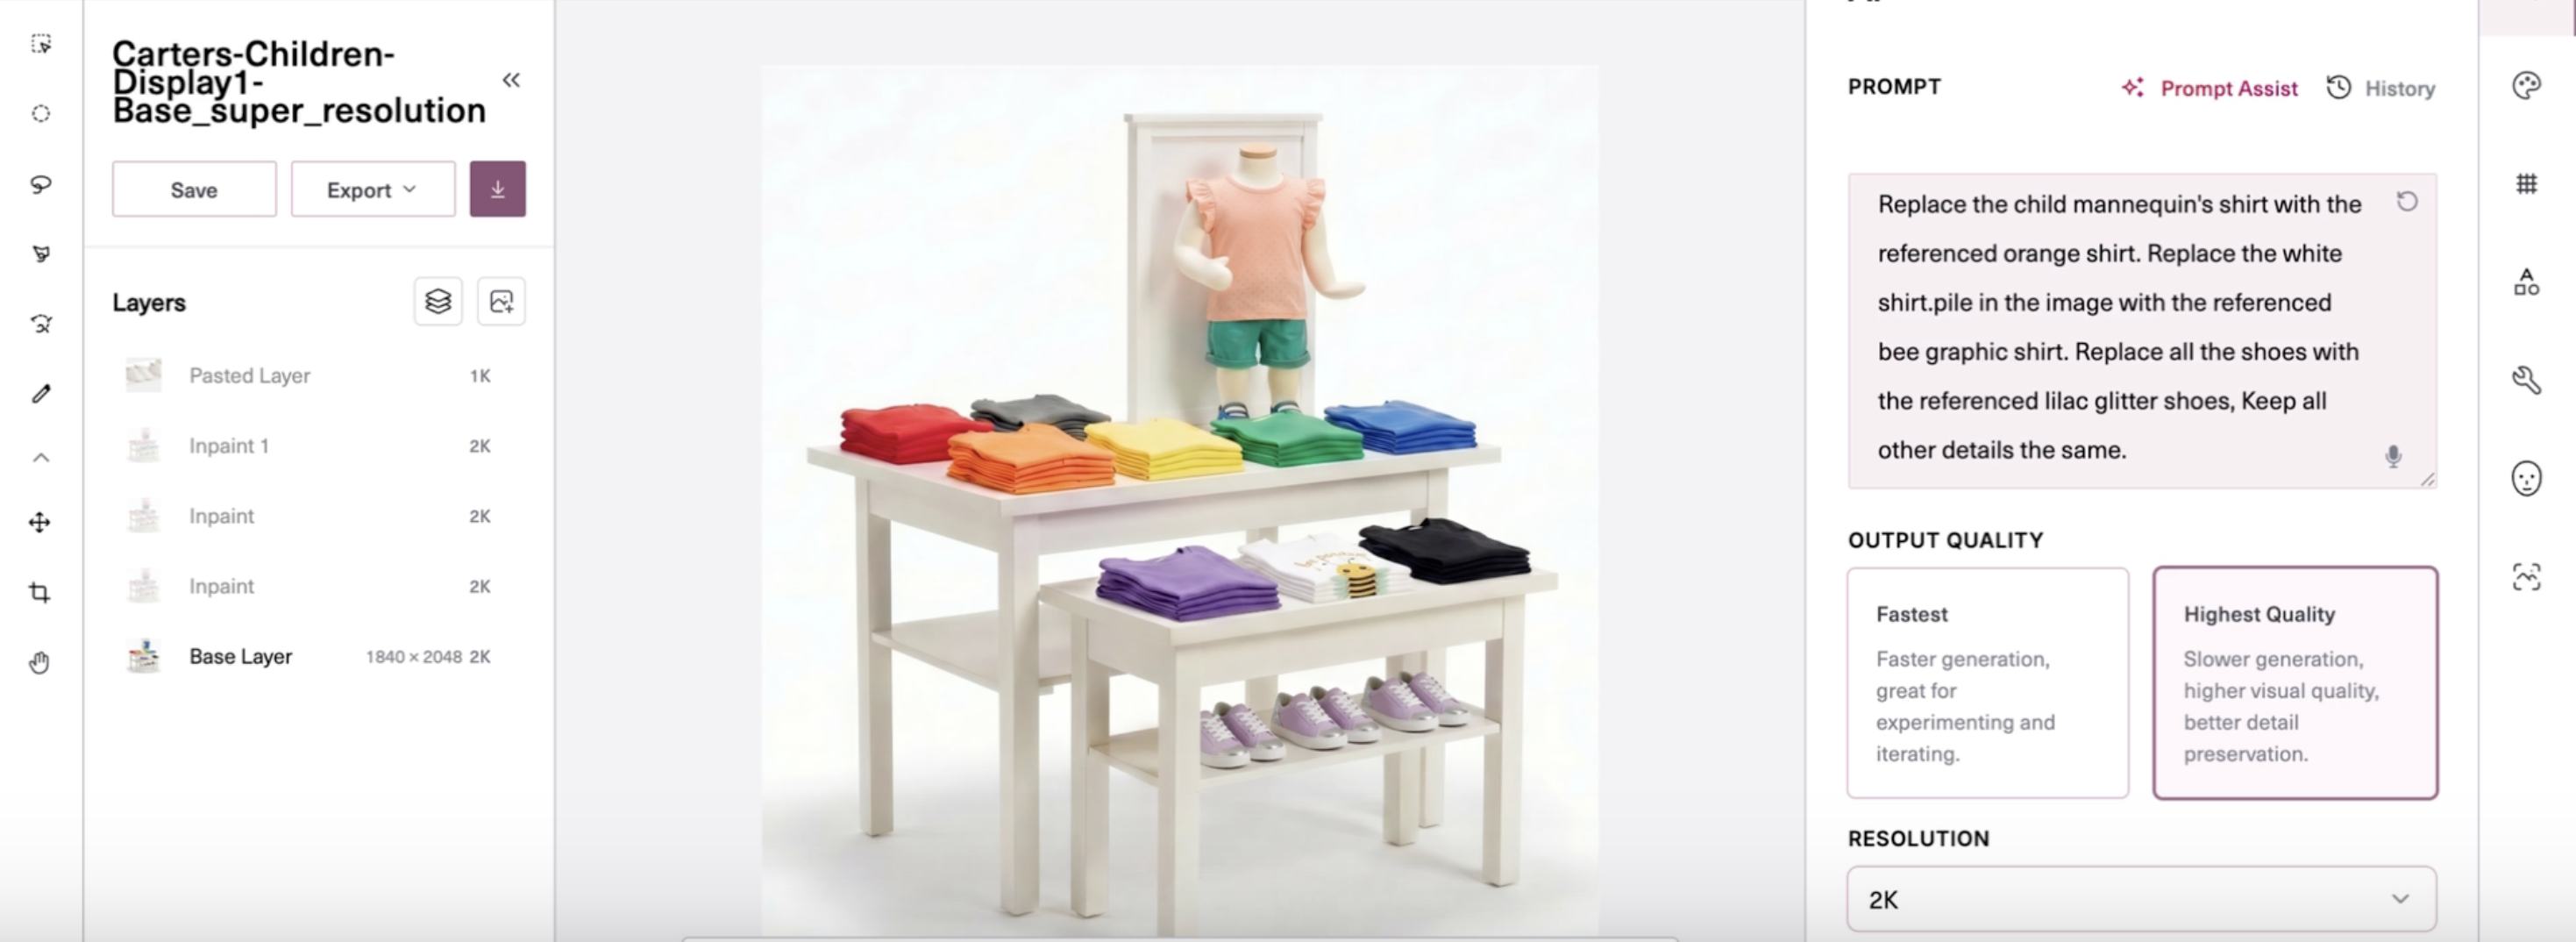
Color-coded replacements (no pin drops needed)
If your base image already uses distinct colors to differentiate display areas — for example, color-coded pile stacks or pre-labeled zones — you can skip pin drops entirely. Just describe each replacement by the color or label already present in the image.
Example prompt:
Replace the child mannequin's shirt with the reference orange shirt.
Replace the white shirt pile in the image with the reference B graphic shirt.
Replace all the shoes with the reference lilac glitter shoes.
Keep all other details the same.Bring in your reference images the same way — as image layers in order — and apply the prompt as usual.
Tips Worth Actually Using
Always include "Remove the pin markers afterwards." If you leave this out, the colored pin drops may appear in your final output. One sentence at the end of your prompt keeps the result clean.
List your references in order and keep track of which number maps to which garment. If you bring in three shirts and your prompt says "reference image 2," make sure image 2 is actually the shirt you mean. Reordering layers after the fact won't change the reference numbering.
Start with fewer pins. If you're new to this, try replacing one or two items first before tackling a full display. You can always run another pass for additional swaps.
Use Highest Quality for final outputs. Fastest mode is great for checking your prompt logic, but switch to Highest Quality when you're ready for production-ready results.